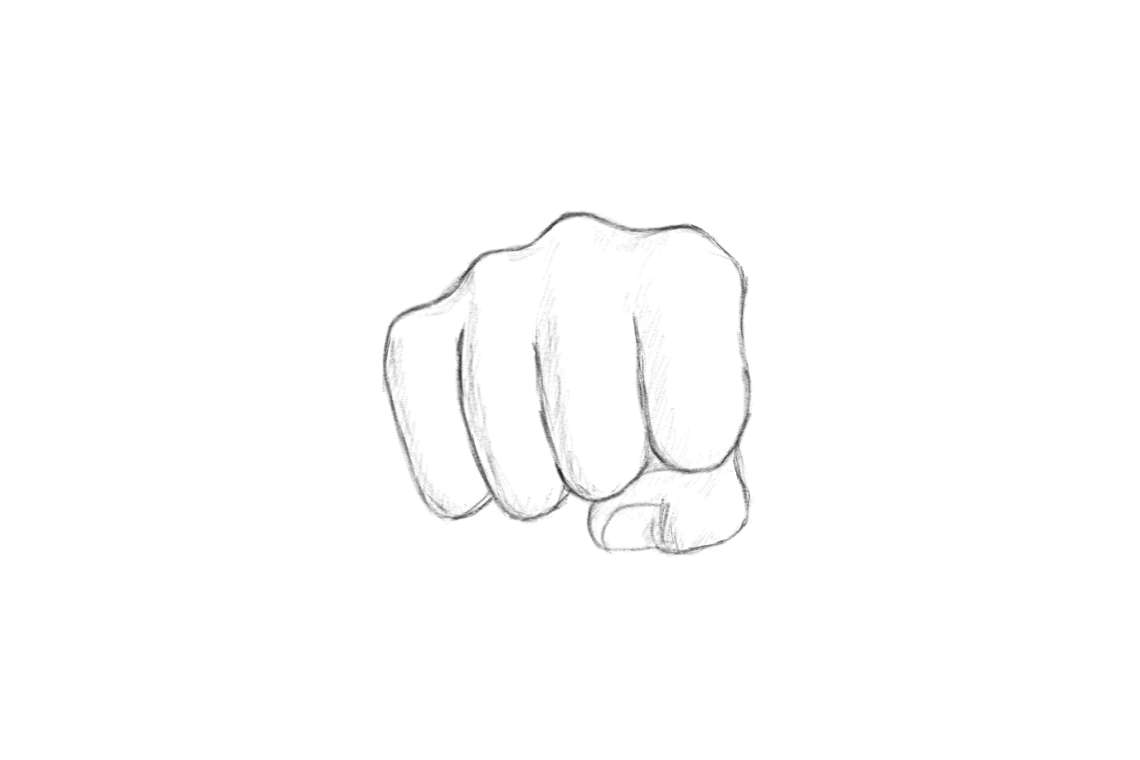
Sketching a fist can be a rewarding and enjoyable experience, particularly when you adhere to these straightforward steps.
Whether you’re a seasoned artist or a newcomer to the world of drawing, this guide is designed to assist you in creating a compelling fist illustration of your own.
This tutorial is designed for beginners and can take approximately 3 hours to complete.
Tools Required:
For this tutorial, I am using a drawing tablet (specifically an iPad Air 5th Generation with the free version of Sketchbook from the app store and an 2nd generation Apple Pencil). Many people already own an iPad as it’s a versatile device – so by adding a digital pencil and a dedicated drawing app, you can turn your iPad into your very own art studio.
However, when I first started out learning to draw, I simply used paper and pencil.
But not all paper and pencils are created equal.
If you want the full artistic experience, consider using the same tools the pros use (thankfully, they’re very affordable).
When selecting paper, I like to use a heavier weight because it can withstand a lot of erasing.
When selecting pencils, a lighter weighted pencil makes it easier to erase lines, while a heavier weight is ideal for finalizing your drawing (refer to the image below, courtesy of Zieler’s handy pencil guide).
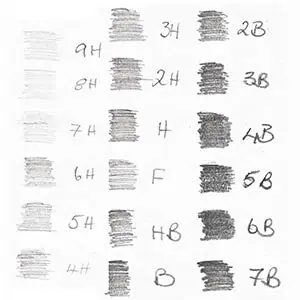
I recommend using a lighter weight of no heavier than F for foundational work, and a heavier weight like HB or B for finalizing your piece.
If you wish to add shading, I like to start with a lighter weight, like F, and systematically add darker shadows by gradually working my way up through my set of darker pencils (for example, starting with F and ending with 7B or 8B).
And don’t forget the eraser – no artists’ kit is complete without it.
My favorite type of eraser for pencil and paper drawings is the Faber-Castell Dust-Free Vinyl Eraser.
Here’s a breakdown of recommended tools for pencil and paper drawing that can easily be found online or at your local craft store.
Paper and Pencil Recommended Tools:
- Strathmore’s 300 Series Bristol paper
- Faber-Castell 9000 Graphite Sketch Pencil Sets Art 8B – 2H set of 12
- Faber-Castell Dust Free Vinyl Eraser
Now that we’ve gone over tool selection, all that’s left is to start drawing a fist!
Step 1: Draw the Basic Shape
Start by sketching a square with your pencil if you’re using traditional pencil and paper. For those working on a tablet, feel free to employ your square or line tools.

Creating the foundational framework for the entire fist is crucial to achieve a polished final image.
When approaching any object or subject, begin by contemplating its most basic geometric shape in its simplest form. As you progress to the next steps, introduce additional structure to give it a more defined appearance.
This process mirrors the construction of a house or building, emphasizing the importance of a sturdy foundation in shaping your ultimate masterpiece.
Step 2: Strengthening the foundation
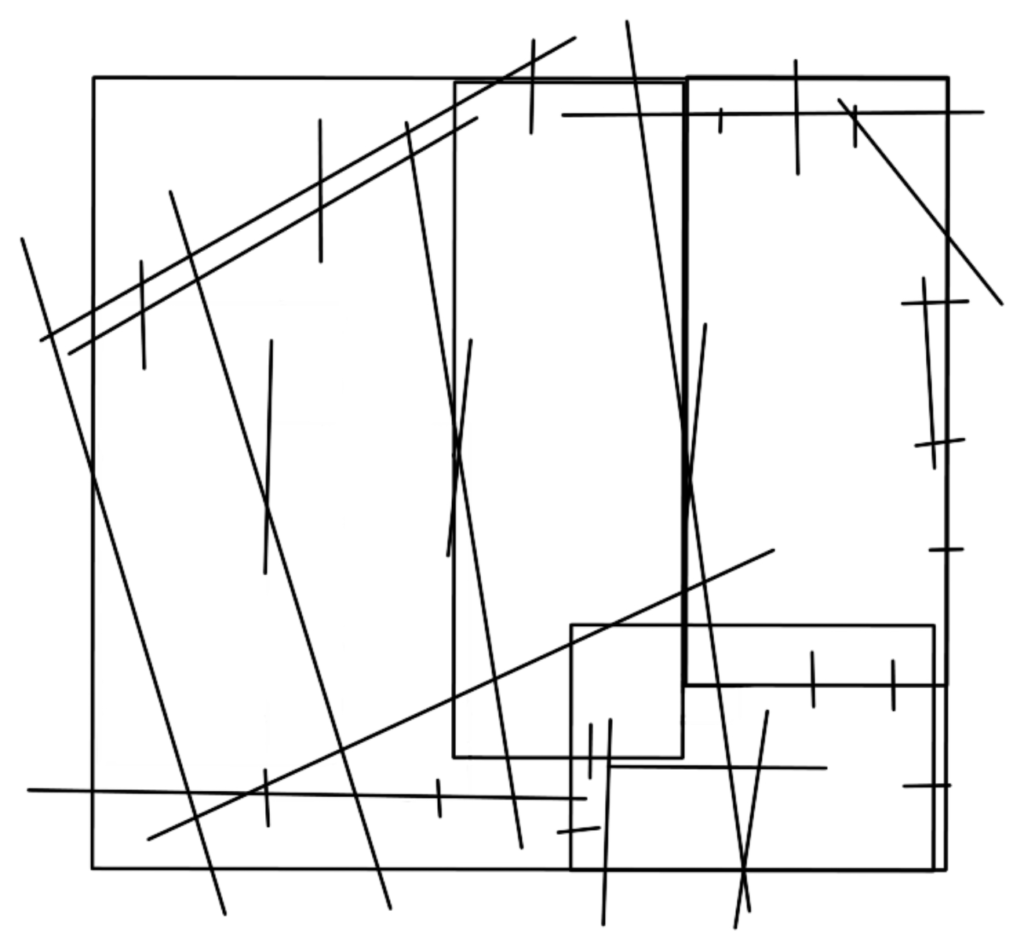
Now, include three rectangles to form the foundational structure for the thumb, index, and middle finger. Begin by sketching a horizontal rectangle on the lower right for the thumb, followed by two vertical rectangles of slightly different lengths, similar to the image below.
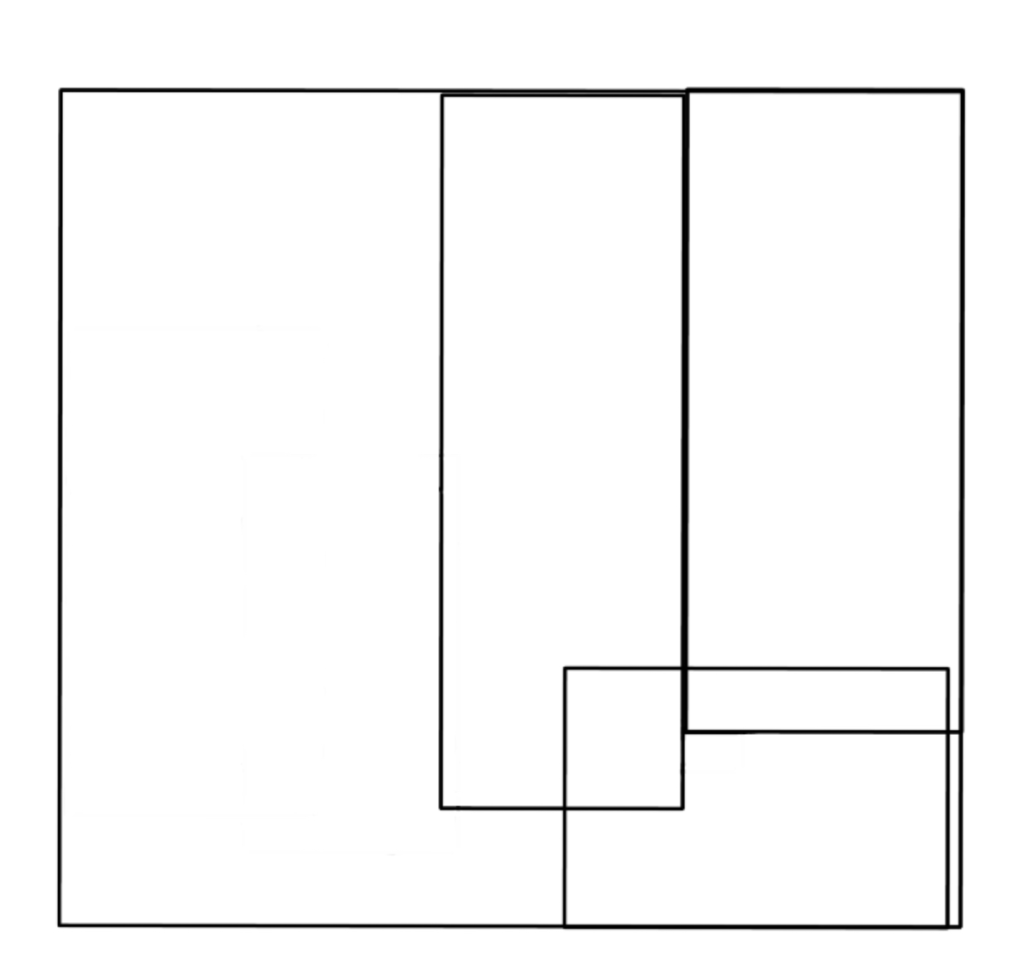
Don’t worry about overlapping lines at this stage; our focus is on establishing the basic structure. If you’re using a pencil, you can erase these lines later. Alternatively, if you’re using a tablet, consider keeping them on a separate layer for the final image.
Step 3: Finger Separation
Now, add four lines to distinguish the four fingers, excluding the thumb. Aim for a slightly diagonal orientation, considering that even though fingers may appear mostly straight, they actually possess a subtle curve.
Begin by drawing a line between the two vertical rectangles designated for the index and middle fingers. Extend the lines further to the left with three more, maintaining a slightly diagonal angle. Keep in mind that the spacing between the lines should gradually decrease as you move toward the pinky (left side of the hand).
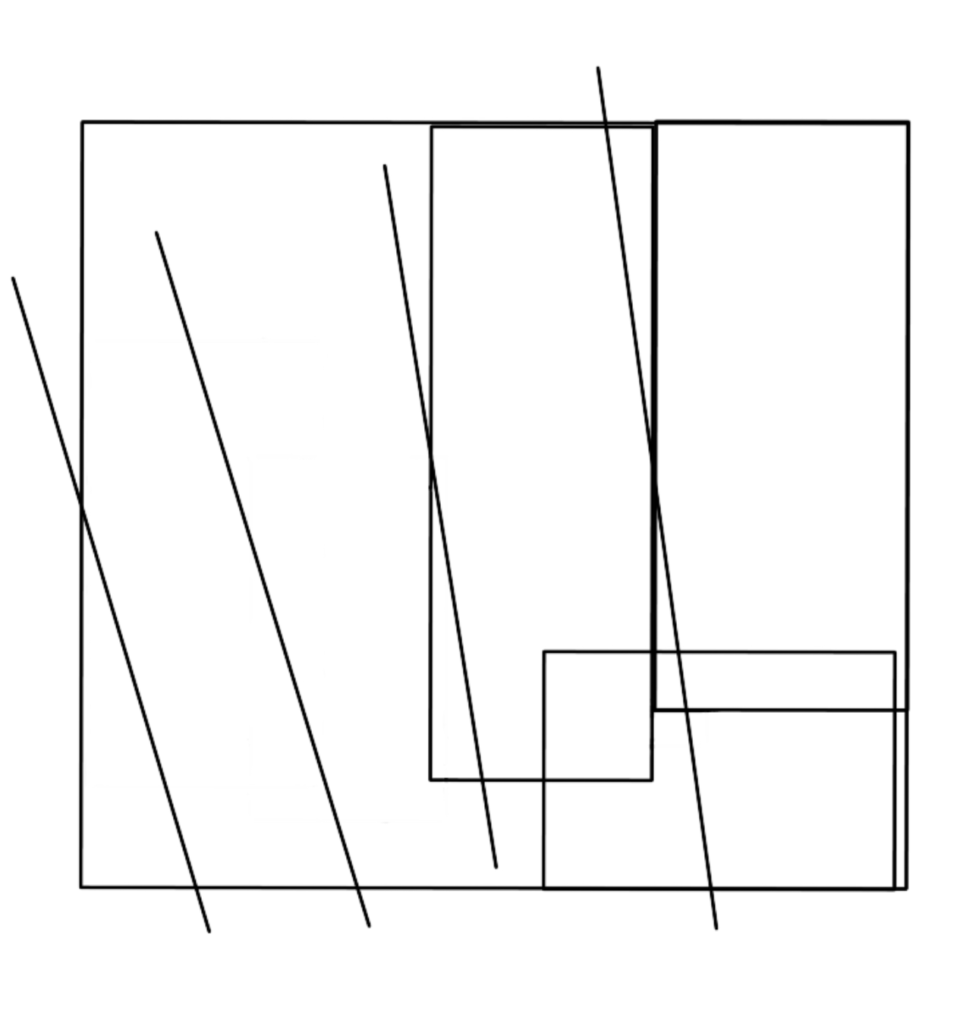
No need for perfection here. The shape of a fist can vary depending on factors like hand size or how one closes their fingers. Your depiction might differ slightly from mine, but it will still authentically capture the essence of a fist.
Step 4: Top of fist and more
Next, sketch some diagonal lines on the upper left to roughly outline the outer sections of the fingers. Then, draw a line slightly lower than the top upper right line.
Afterward, add almost vertical lines that separate the four fingers. This will aid in refining the distinctions between the fingers on the fist. Keep in mind that the fingers in a clenched fist aren’t perfectly rectangular or tubular, so these basic outlines will guide us in drawing the finished product.
Step 5: Further fist definition
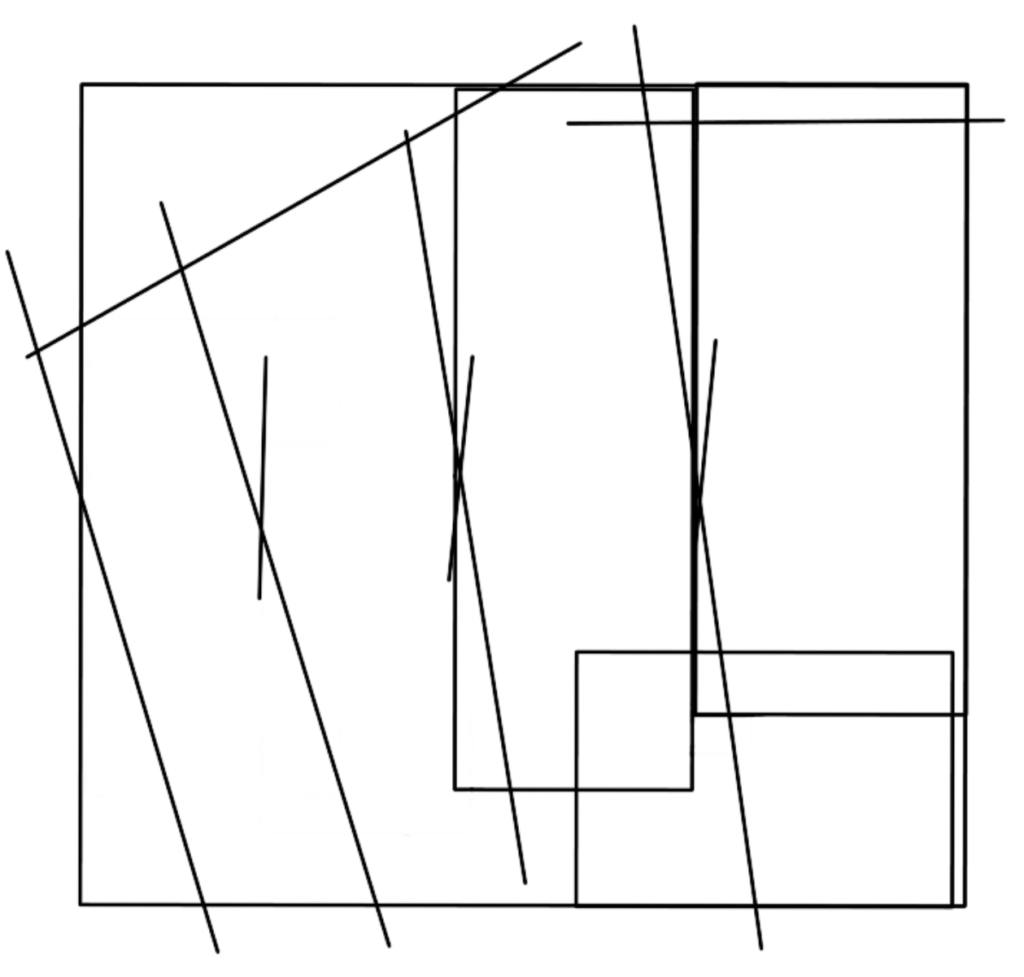
Now, introduce a horizontal line at the bottom of the lower left of the fist to establish the length of the middle finger, ring finger, and pinky finger. Additionally, include a diagonal line on the upper left, slightly lower than the previous line. This line serves as a reference point for the varied heights of the three fingers and the bends on that side of the hand.
Step 6: Finding the center
Next, let’s establish rough points for the centers of each finger. While this may seem optional, having a visual reference is always beneficial. It simplifies the process when drawing curved lines later, especially when aiming for symmetry in curves and lines on each side of a finger.
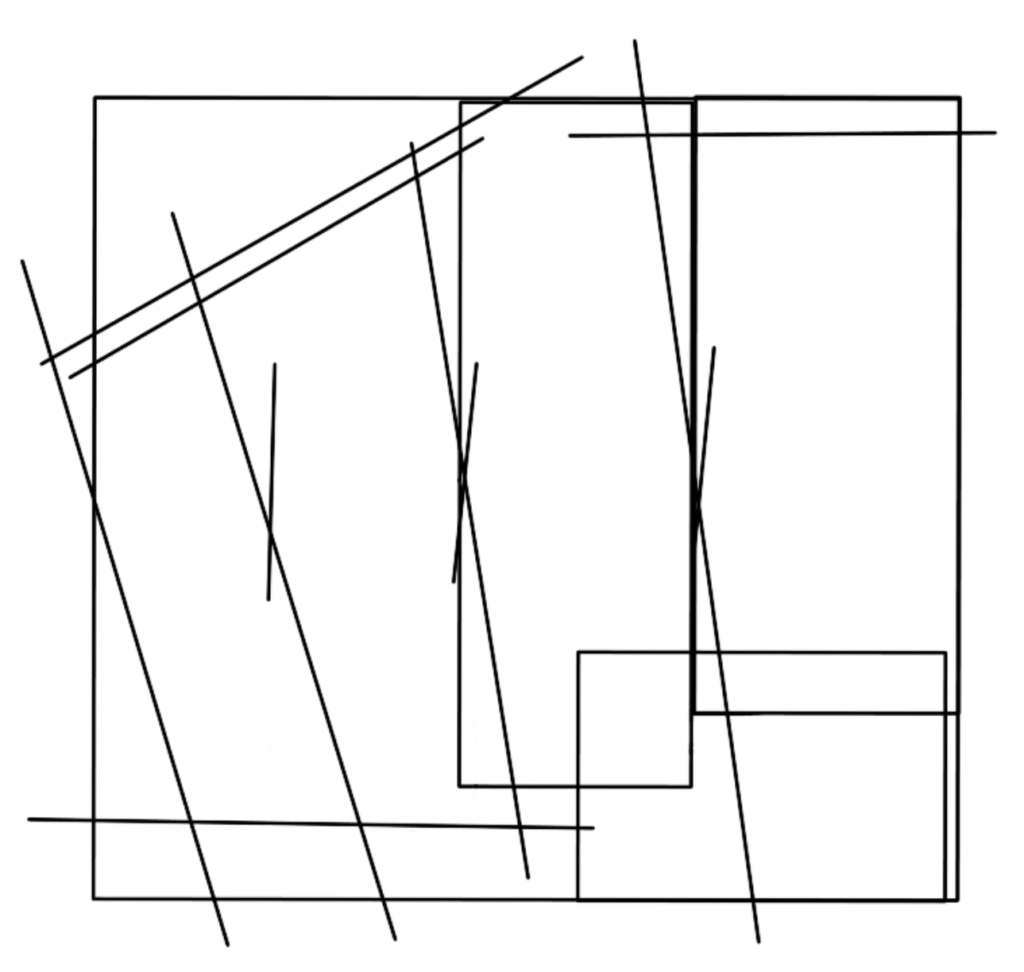
Step 7: Creating our Thumbnail
Next, create the structure for the thumbnail. Utilize the line we drew as a reference for the center of our thumb tip, and draw three lines to form a box intersecting with the larger square outline. Don’t stress about making it a perfect square; it’s just a rough outline.
Step 8: Knuckle placement
Create the structure for our thumbnail by drawing three lines near the reference point we marked for the center of the thumb tip. Form a box that intersects with the larger square outline; it doesn’t need to be a perfect square, just a rough outline.
Draw a diagonal line in the lower left, indicating the approximate location of the lower knuckles. Also, sketch a diagonal line in the upper right to outline the outer area of the index finger. Then, draw a slightly vertical line adjacent to it to mark where the finger gently curves in, aiding in the creation of a more distinct curve for the index finger when drawing the curves.
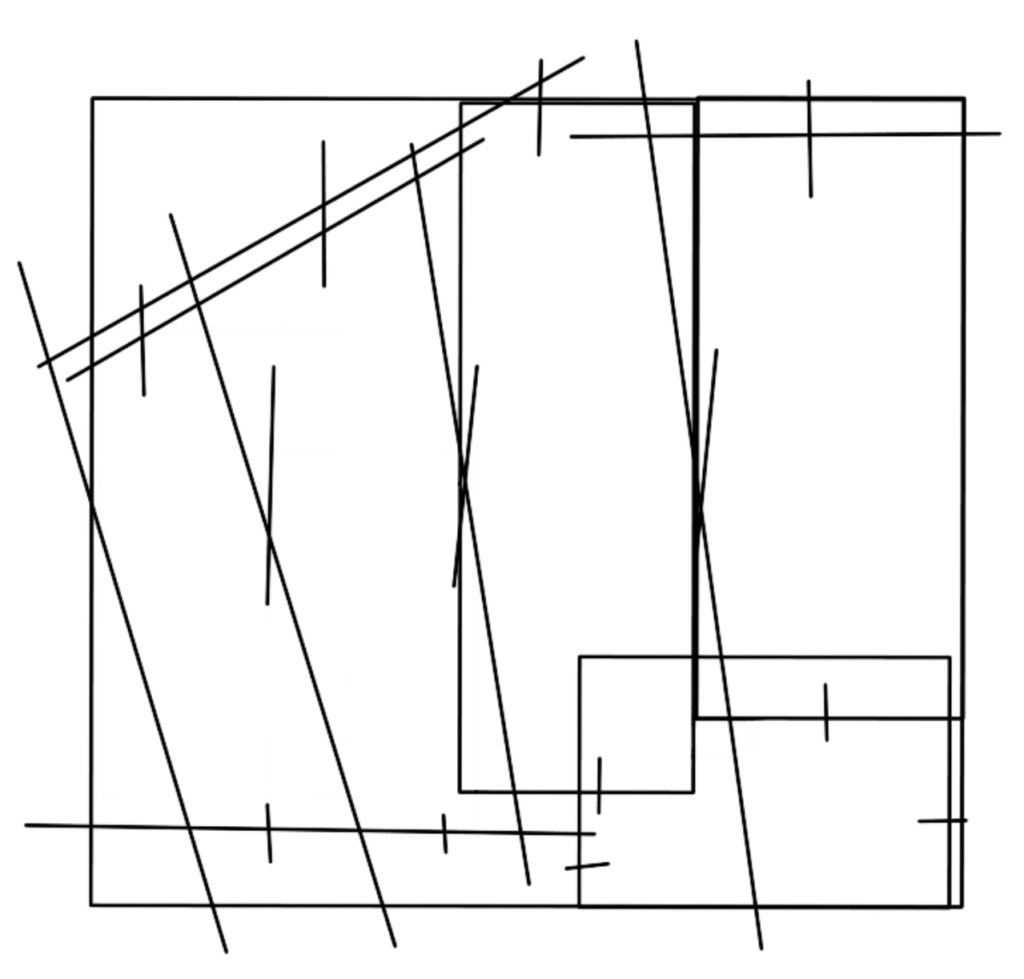
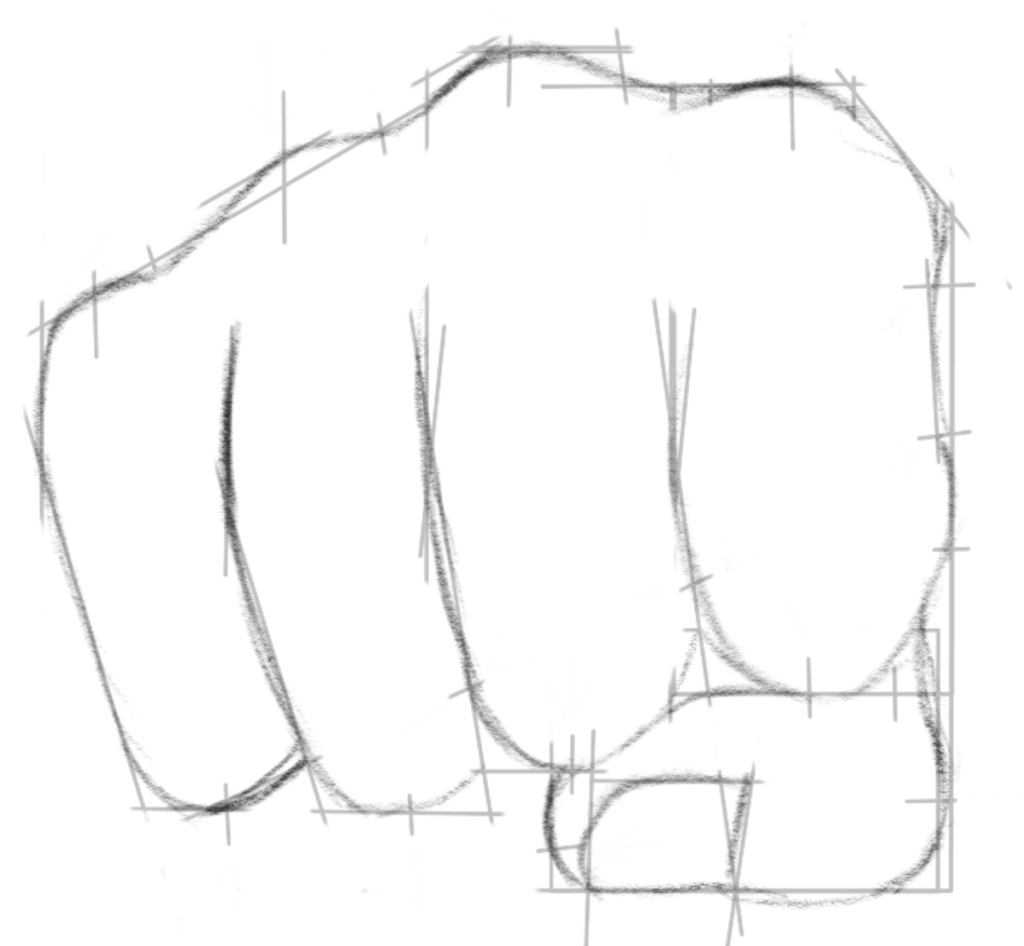
Step 9: Cleaning up the Lines
You’ve made excellent progress. Now, let’s begin refining and cleaning up those lines to provide a clearer view of your basic structure.
If you’re using pencil and paper, start erasing some of the unnecessary lines. Consider it akin to a sculptor carefully chipping away parts of marble to reveal their carefully defined vision underneath.
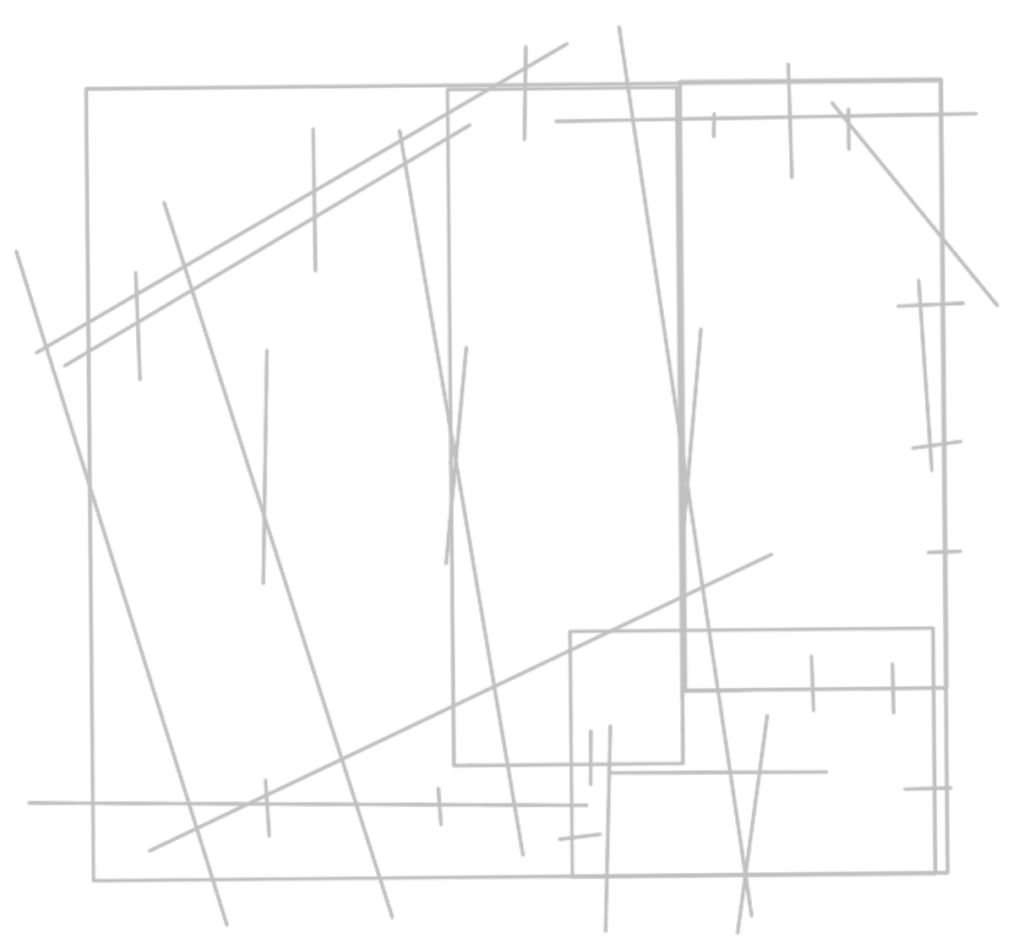
For those working digitally, lower the opacity of your current layer to approximately 30%. Next, create a new layer to draw over the existing outline structure.
You’ve already put in the majority of the work, and your fist is nearly complete. Great job!
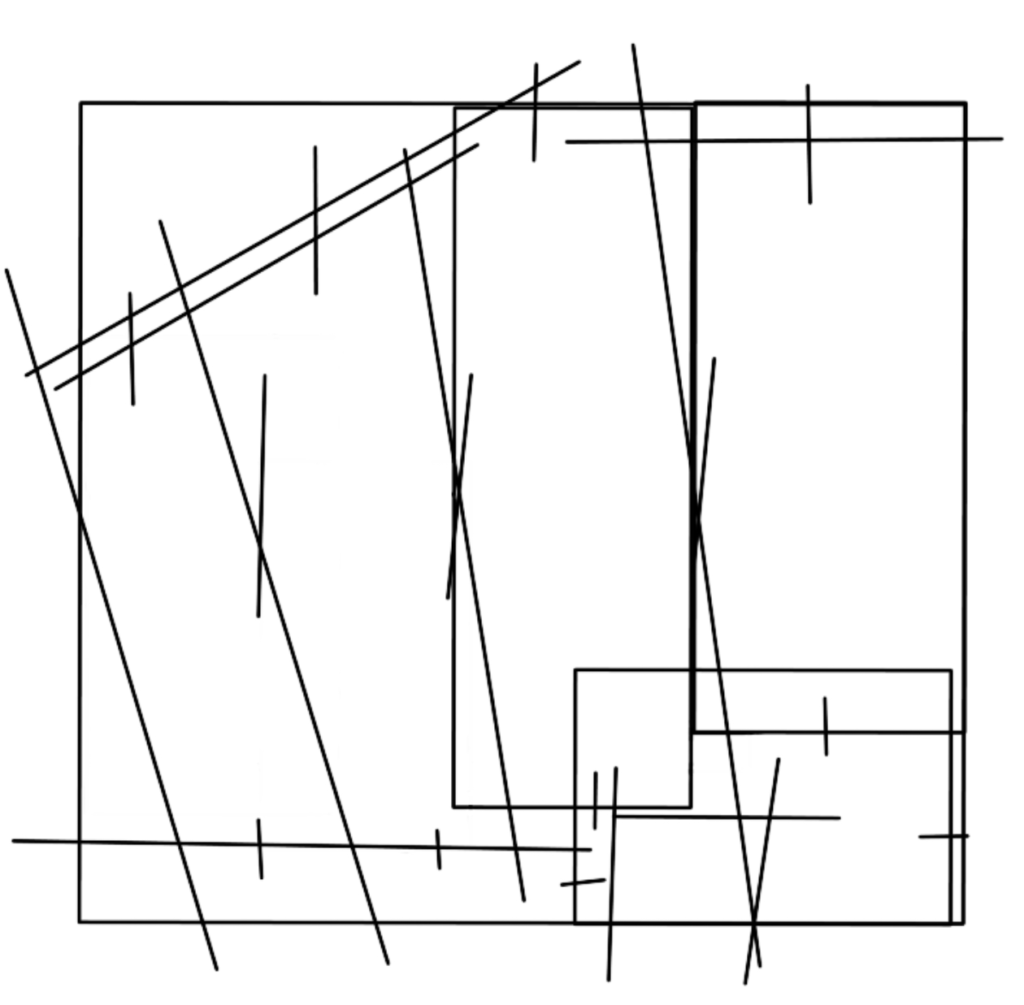
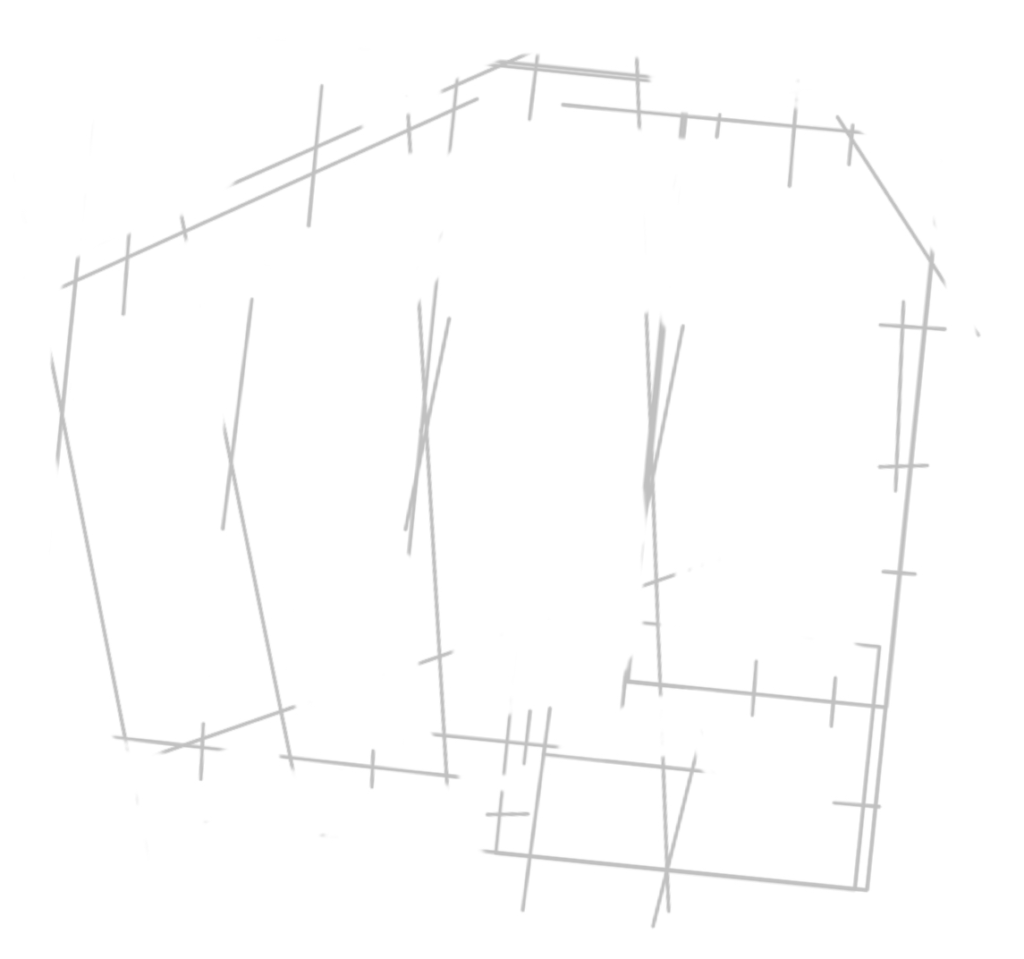
Step 10: Line Drawing
Once again, great work on your progress. Drawing outlines might not be as exciting as completing the final product, but it’s a necessary step.
Now, focus on sketching the fingers and outlining your hand. Recall the reference lines we marked for the center of your fingers. Include the fingernails using the outline you created earlier.
Excellent! You’re almost done.
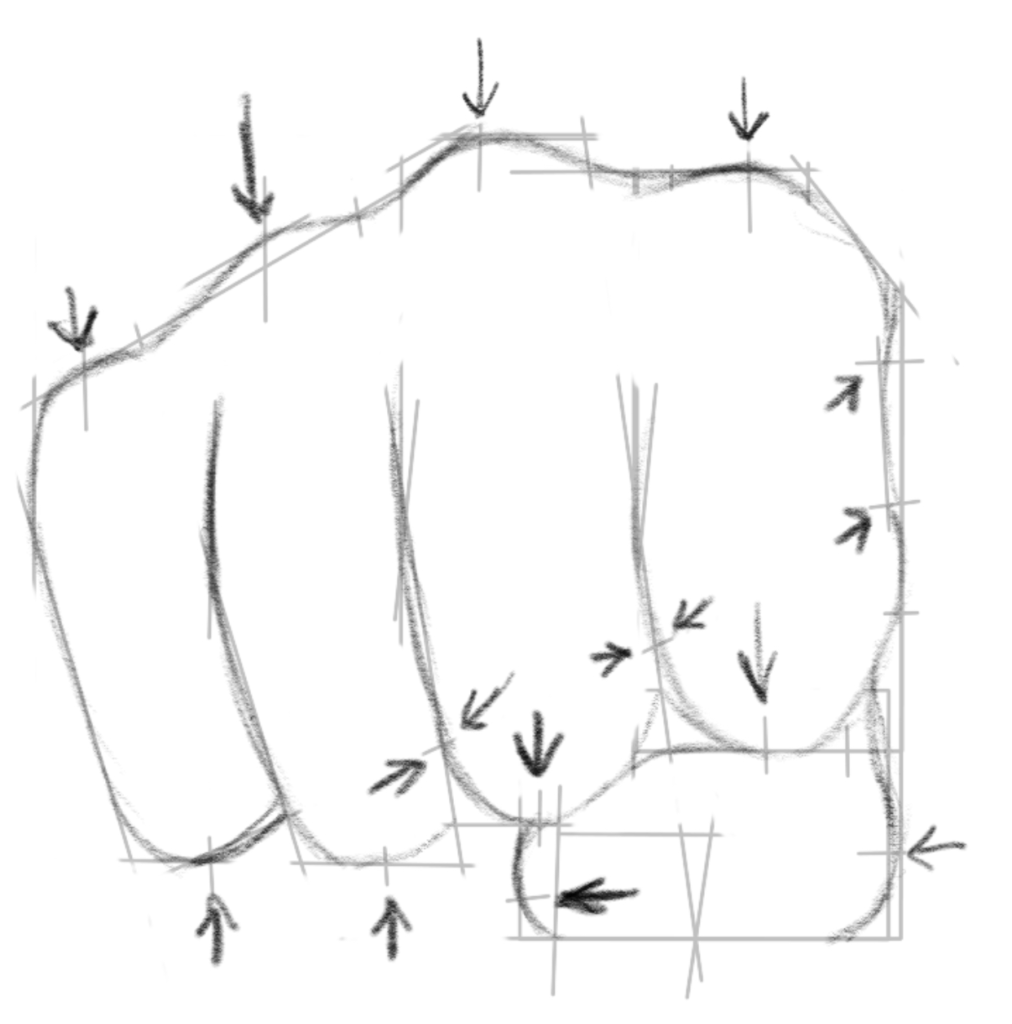
Step 11: Polishing and Finishing
Now, let’s wrap things up. If you’re working with pencil and paper, go back and erase the initial structural lines. Darken the lines for your finished fingers to give your drawing its final touch.
For digital artists, you can easily turn off or delete the outline layer, and your finished drawing is ready.

Conclusion
Congratulations on successfully drawing a fist!
Whether you intend to use your artwork for decoration, art practice, or simply for enjoyment, your accomplishment is truly commendable. Feel free to add your own creative style by experimenting with shading, adding color, or including additional details to make your fist even more distinctive.
Keep in mind that the pursuit of perfection is not essential—your fist is already wonderful because it reflects your unique style. As you continue to refine your drawing skills, enjoy the process, and embrace the fact that consistent practice is the key to improvement.
Thank you, for joining me to draw a fist today. I hope you found this project fun and enjoyable and I hope you find great joy in drawing many wonderful things in your future.
Happy drawing!