
Roses, revered for their enduring symbolism of beauty and love, have graced the canvases of artists throughout history. Whether you’re embarking on the exciting journey of artistry or already a seasoned sketcher, delving into the world of drawing roses offers a rewarding pursuit.
In this article we’ll take a practical, step-by-step approach to drawing roses. You’ll get easy-to-follow techniques, info on the materials you’ll need, and some handy tips to start your own rose-drawing journey. Our main goal here is to provide an accessible guide for beginners, helping you create your own beautiful rose drawings with confidence, whether you’re new to art or looking to improve your skills.
Materials and Tools
The supplies you’ll need vary depending on whether you’re drawing digitally on a tablet or working with traditional materials like paper, pencils, or pens. Drawing in both digital and traditional mediums has been a significant part of my artistic journey, and I’d like to share some tools I’ve found useful based on my experiences. While I can’t cover every software or supply available, I’m here to offer recommendations based on my personal insights and expertise.
Now, when it comes to traditional paper and pencil drawing, I’d suggest considering Faber-Castell pens and pencils for their consistent quality; you can easily find them at most craft stores. As for paper, Strathmore Bristol drawing paper is a versatile choice, offering various sizes and weights to match your project’s requirements. If you’re expecting to do extensive pencil, eraser, and pen work, you might want to go for a sturdier 100 lb. weight paper. While tools like rulers or corner tools can be handy, everyday objects like book edges or plastic cards work just as well for creating straight lines, providing a solid foundation for your artwork.
Now, if you’re stepping into the digital realm, the first decision revolves around selecting your tools. Personally, I’ve found great success using an Apple iPad Air 5th generation in combination with the Apple Pencil. To bring your digital art to life, I recommend trying out the free version of the Sketchbook App, conveniently available on the Apple Store.
Observation and Preparation

In our creative journey, one fundamental aspect is the observation of real roses or reference images, and it holds a vital place in the artist’s toolkit. This practice allows artists to truly grasp the intricate details, shapes, and nuanced lighting that define roses. Real roses, in particular, offer a tactile understanding of their three-dimensional presence, while reference images provide a versatile array of perspectives and variations. This meticulous observation forms the cornerstone of creating accurate and lifelike rose drawings.
Now, when it comes to honing your artistic skills, selecting the right reference image becomes a crucial step in the process. Seek out images that feature clear and well-defined details, along with favorable lighting conditions and angles that align with your artistic vision. By doing so, you ensure that your chosen references provide a strong foundation upon which to build your artwork.
Step-by-Step Drawing Guide
In this tutorial, we will focus on drawing a rose from a side perspective, using a reference image.
As you gain practice and experience, you will eventually develop the skill to draw a rose from memory.
Step 1
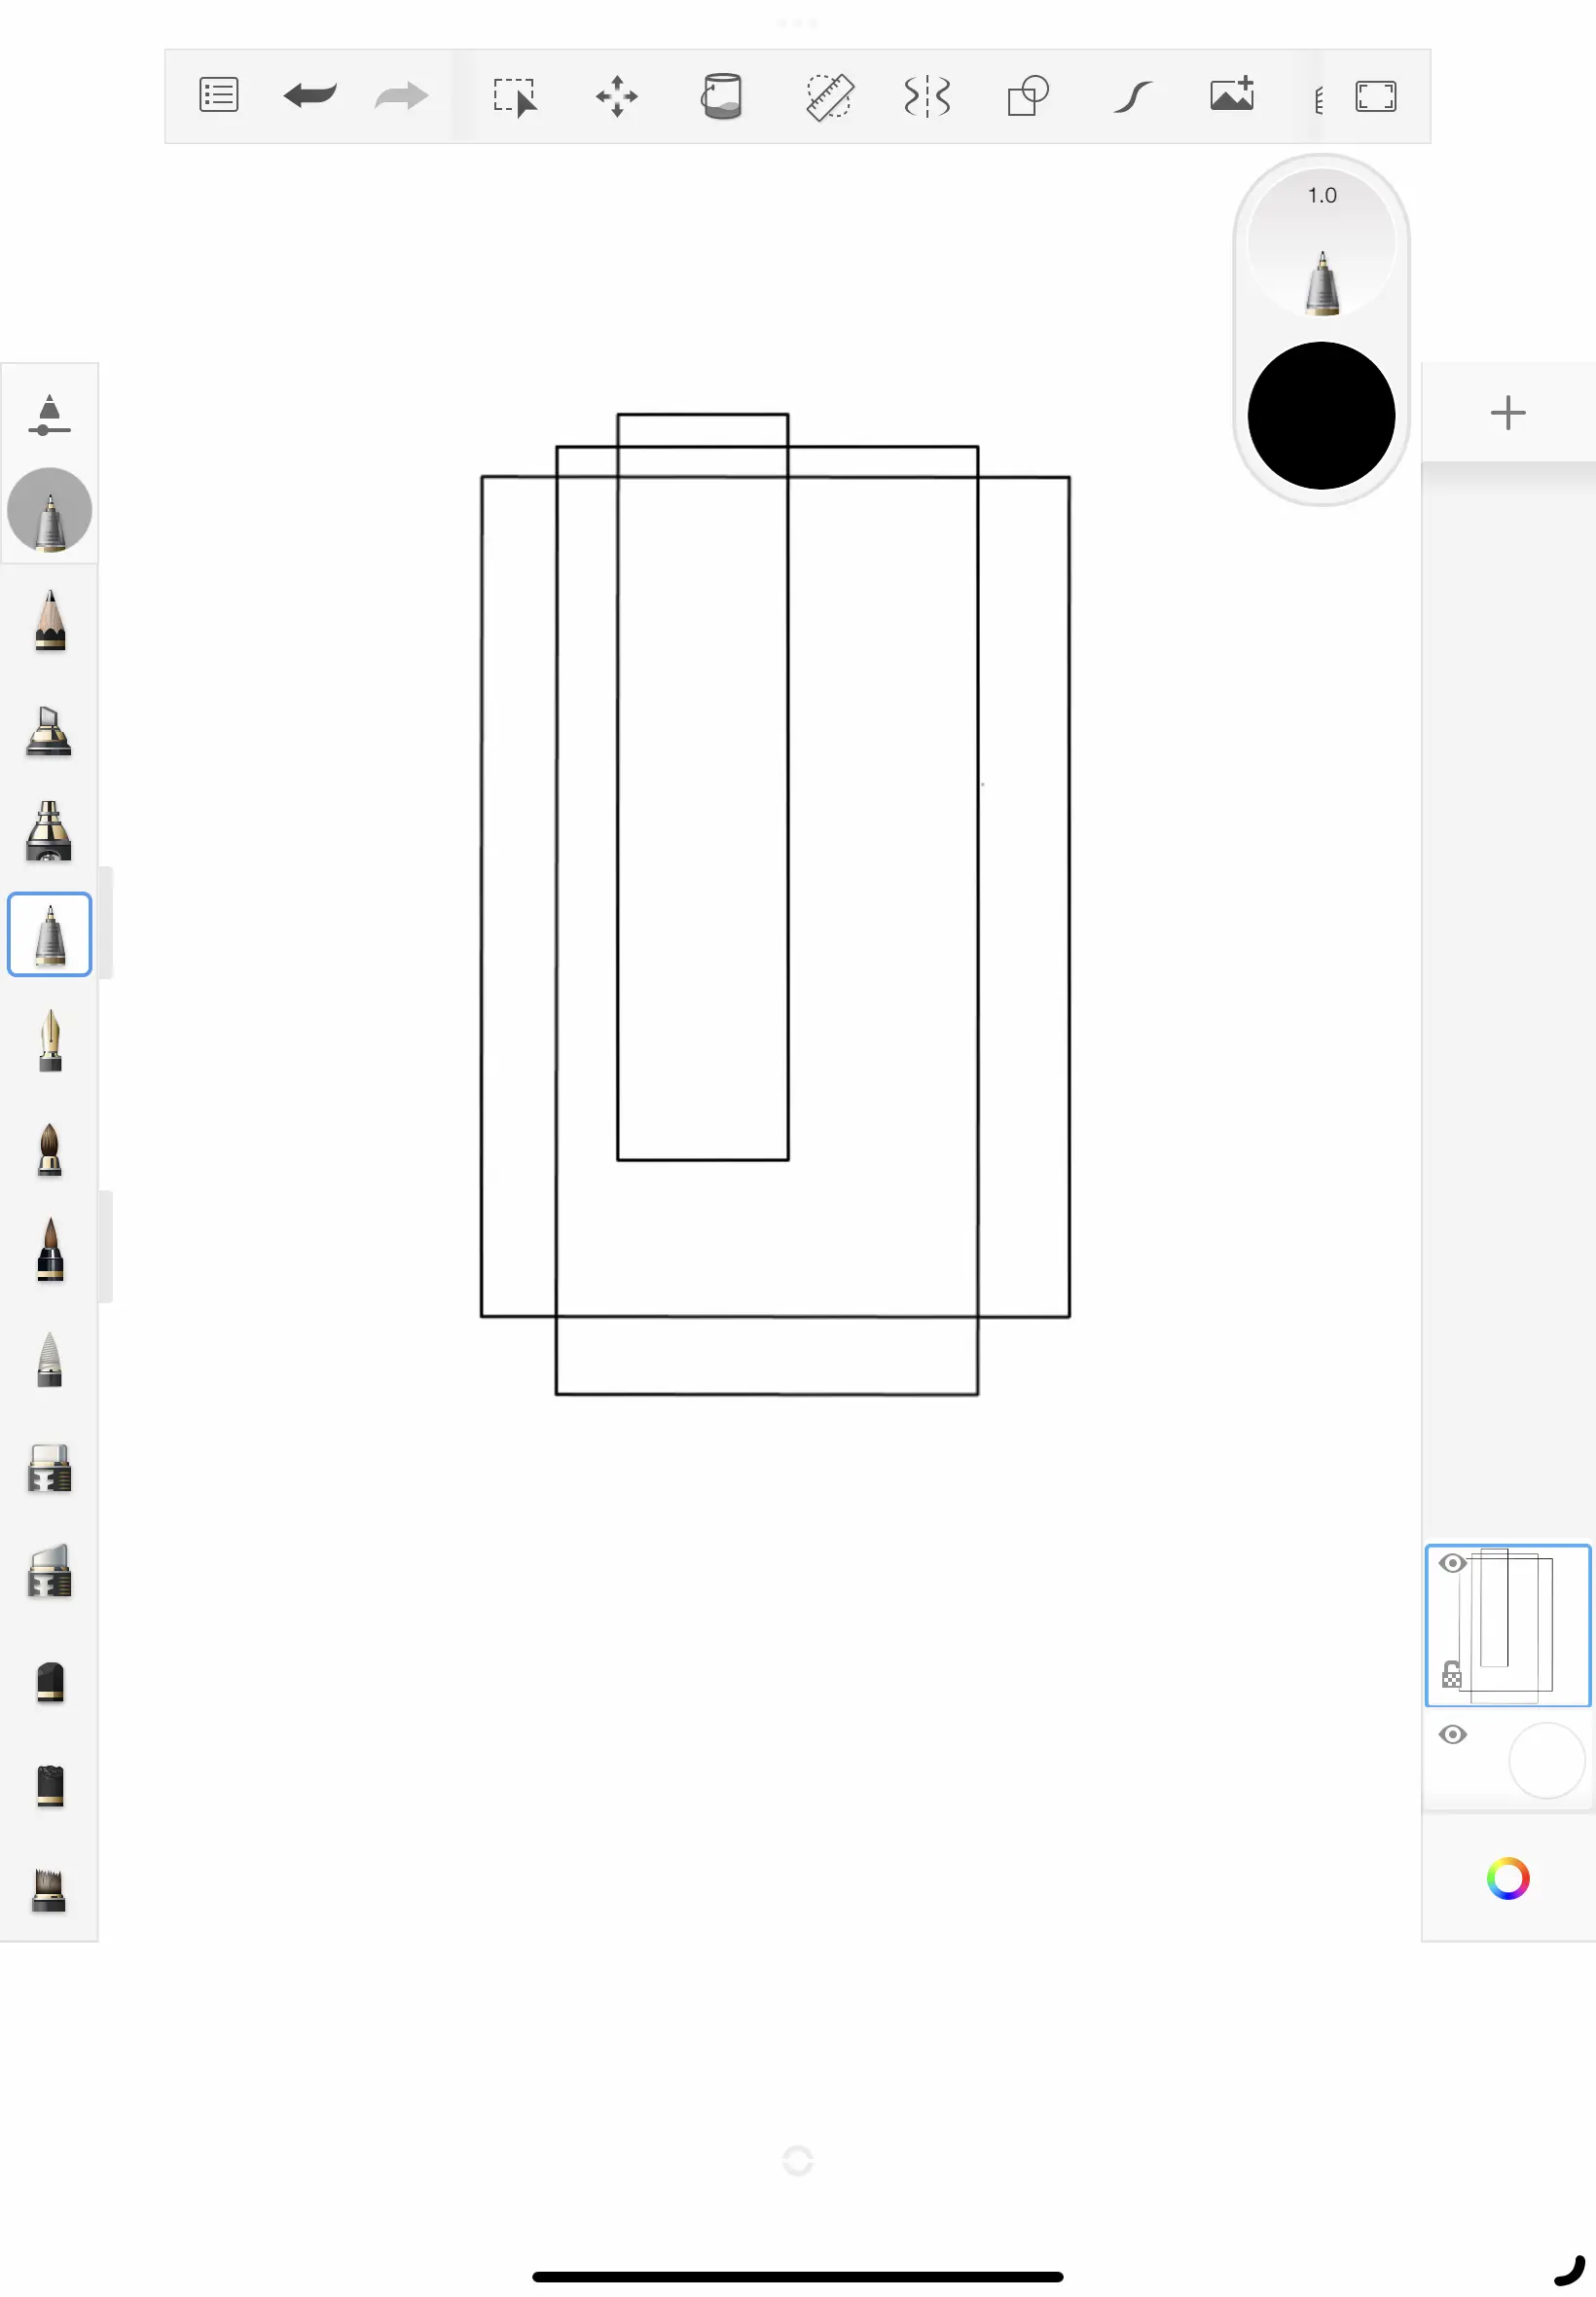
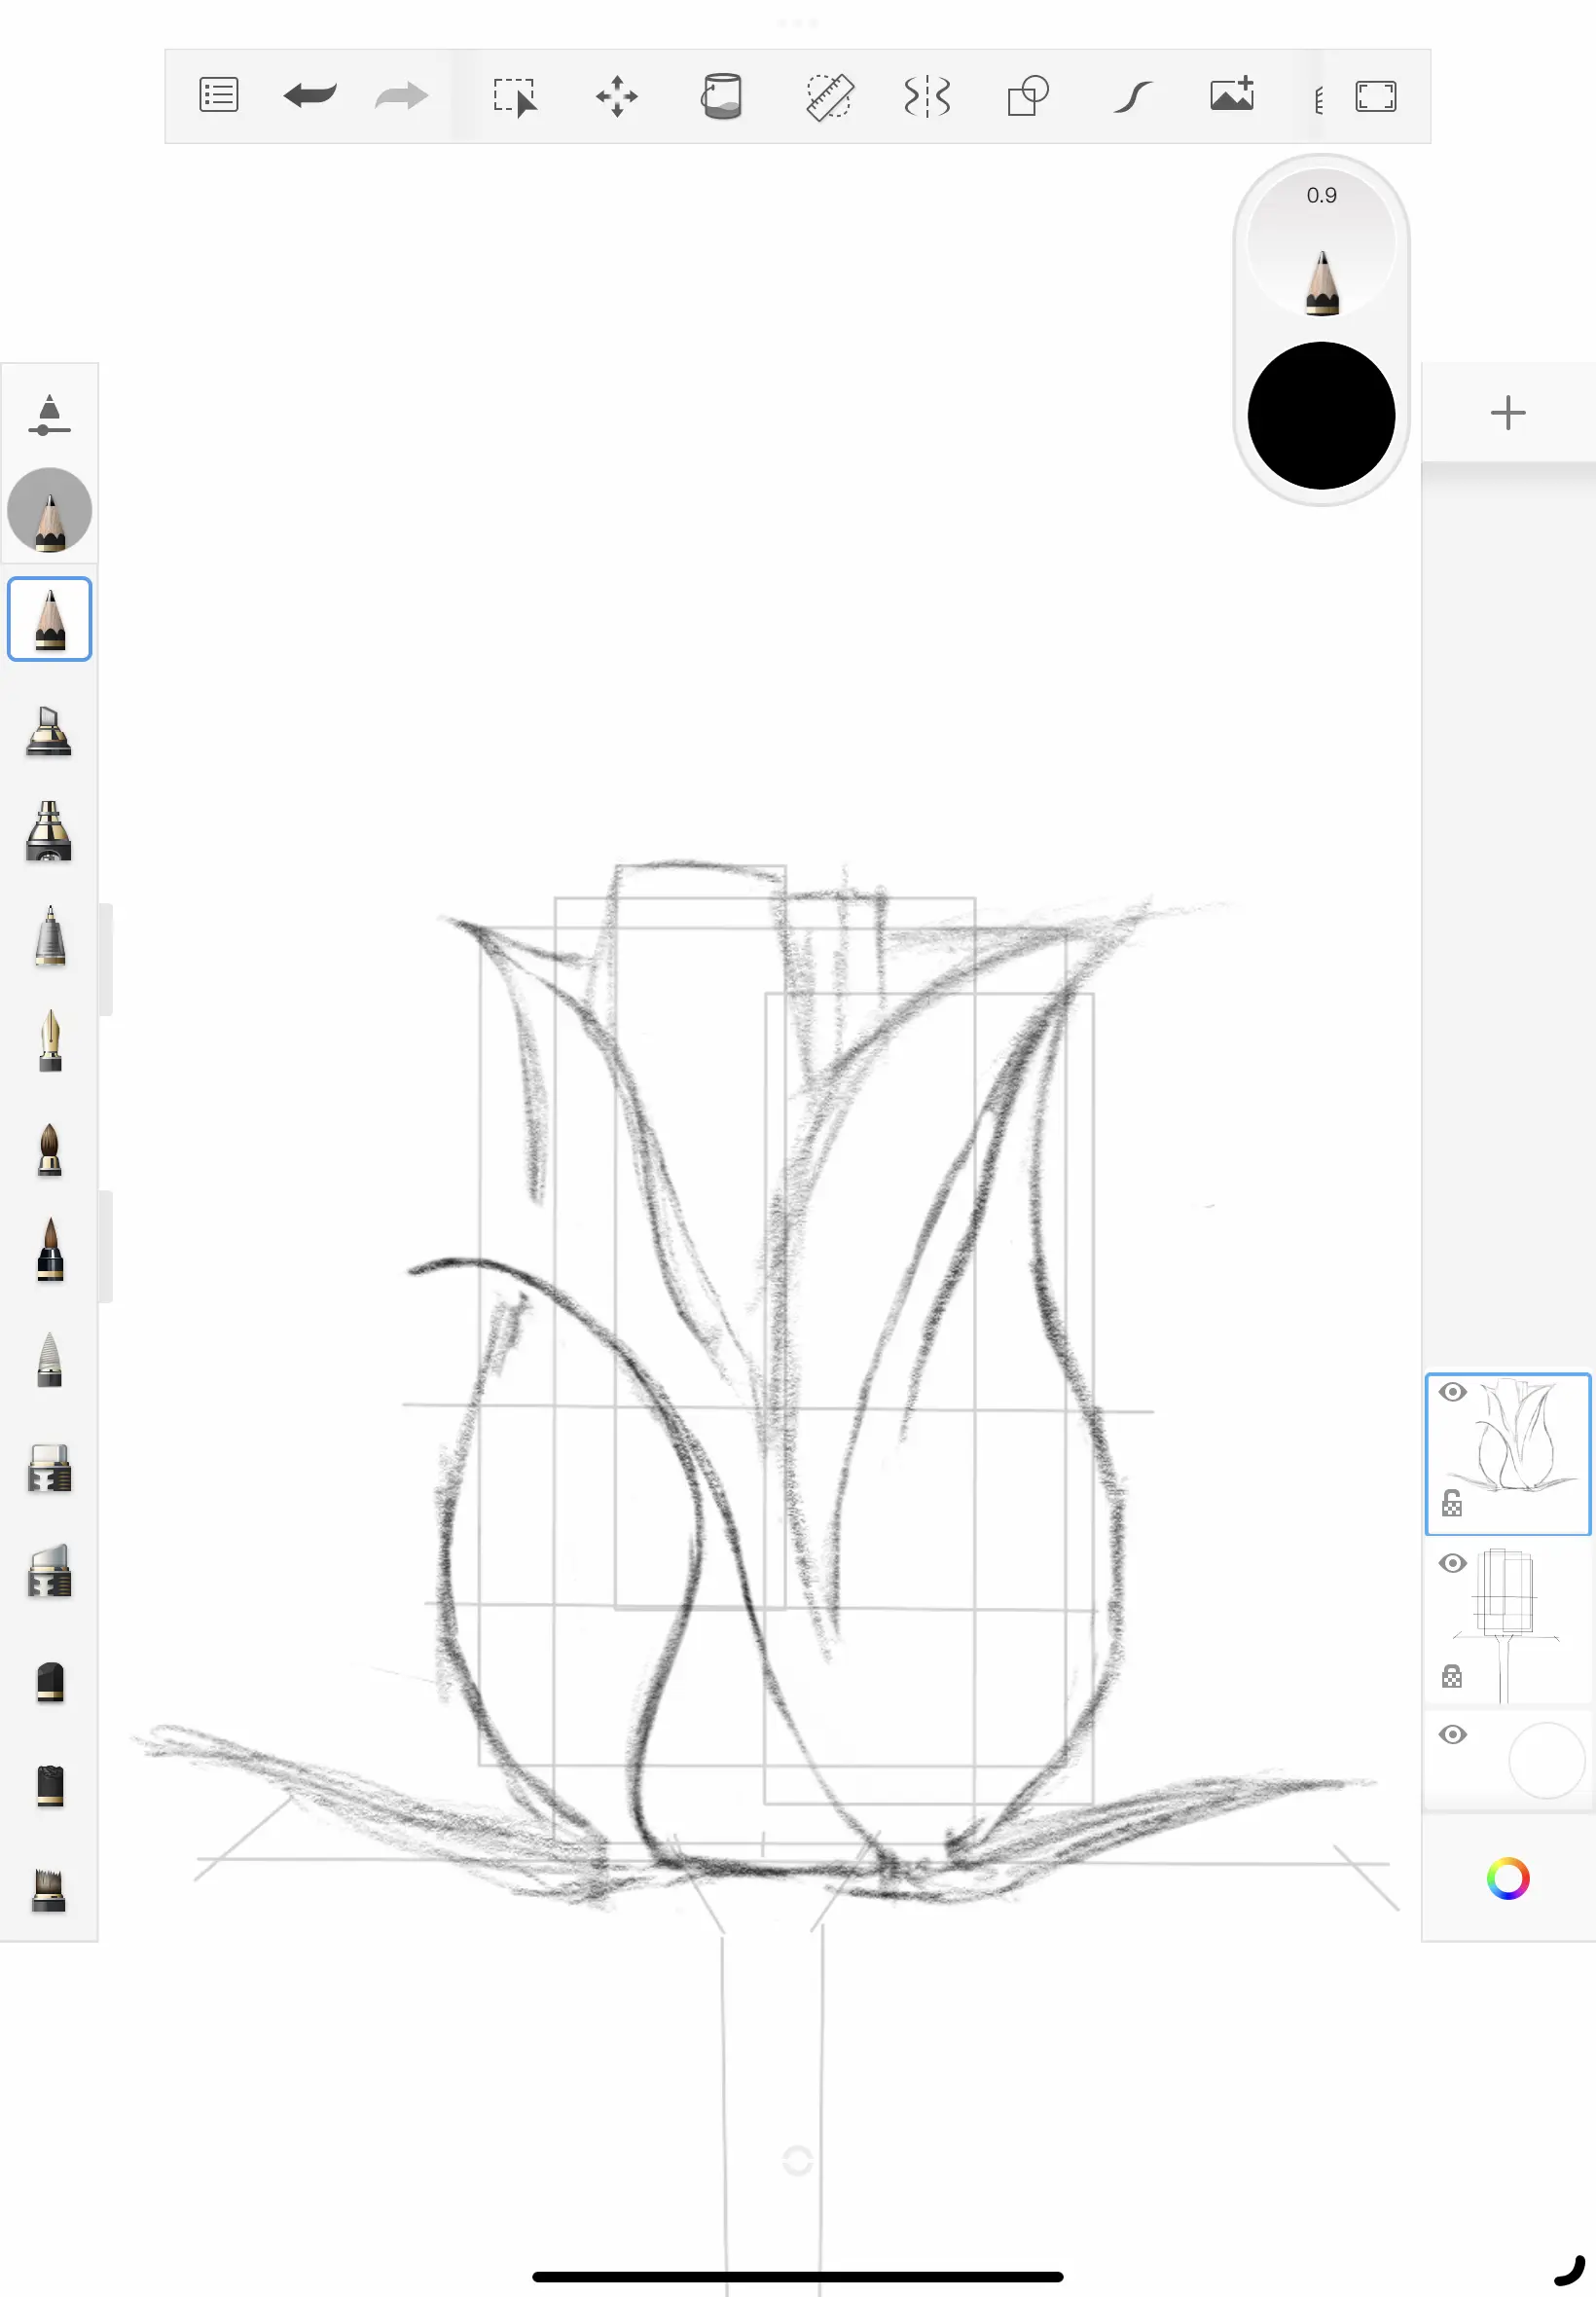
To begin, let’s establish our foundation, much like constructing the base of a house. This foundation will serve as our reference framework as we progress step by step.
Start by creating a set of rectangles that roughly outline the size and shape of the flower petals. If you’re working with traditional materials like paper and a pencil, use light strokes or an ‘F’ pencil for this initial framework. Once you’ve sketched out most of your image, be prepared to erase these lines.
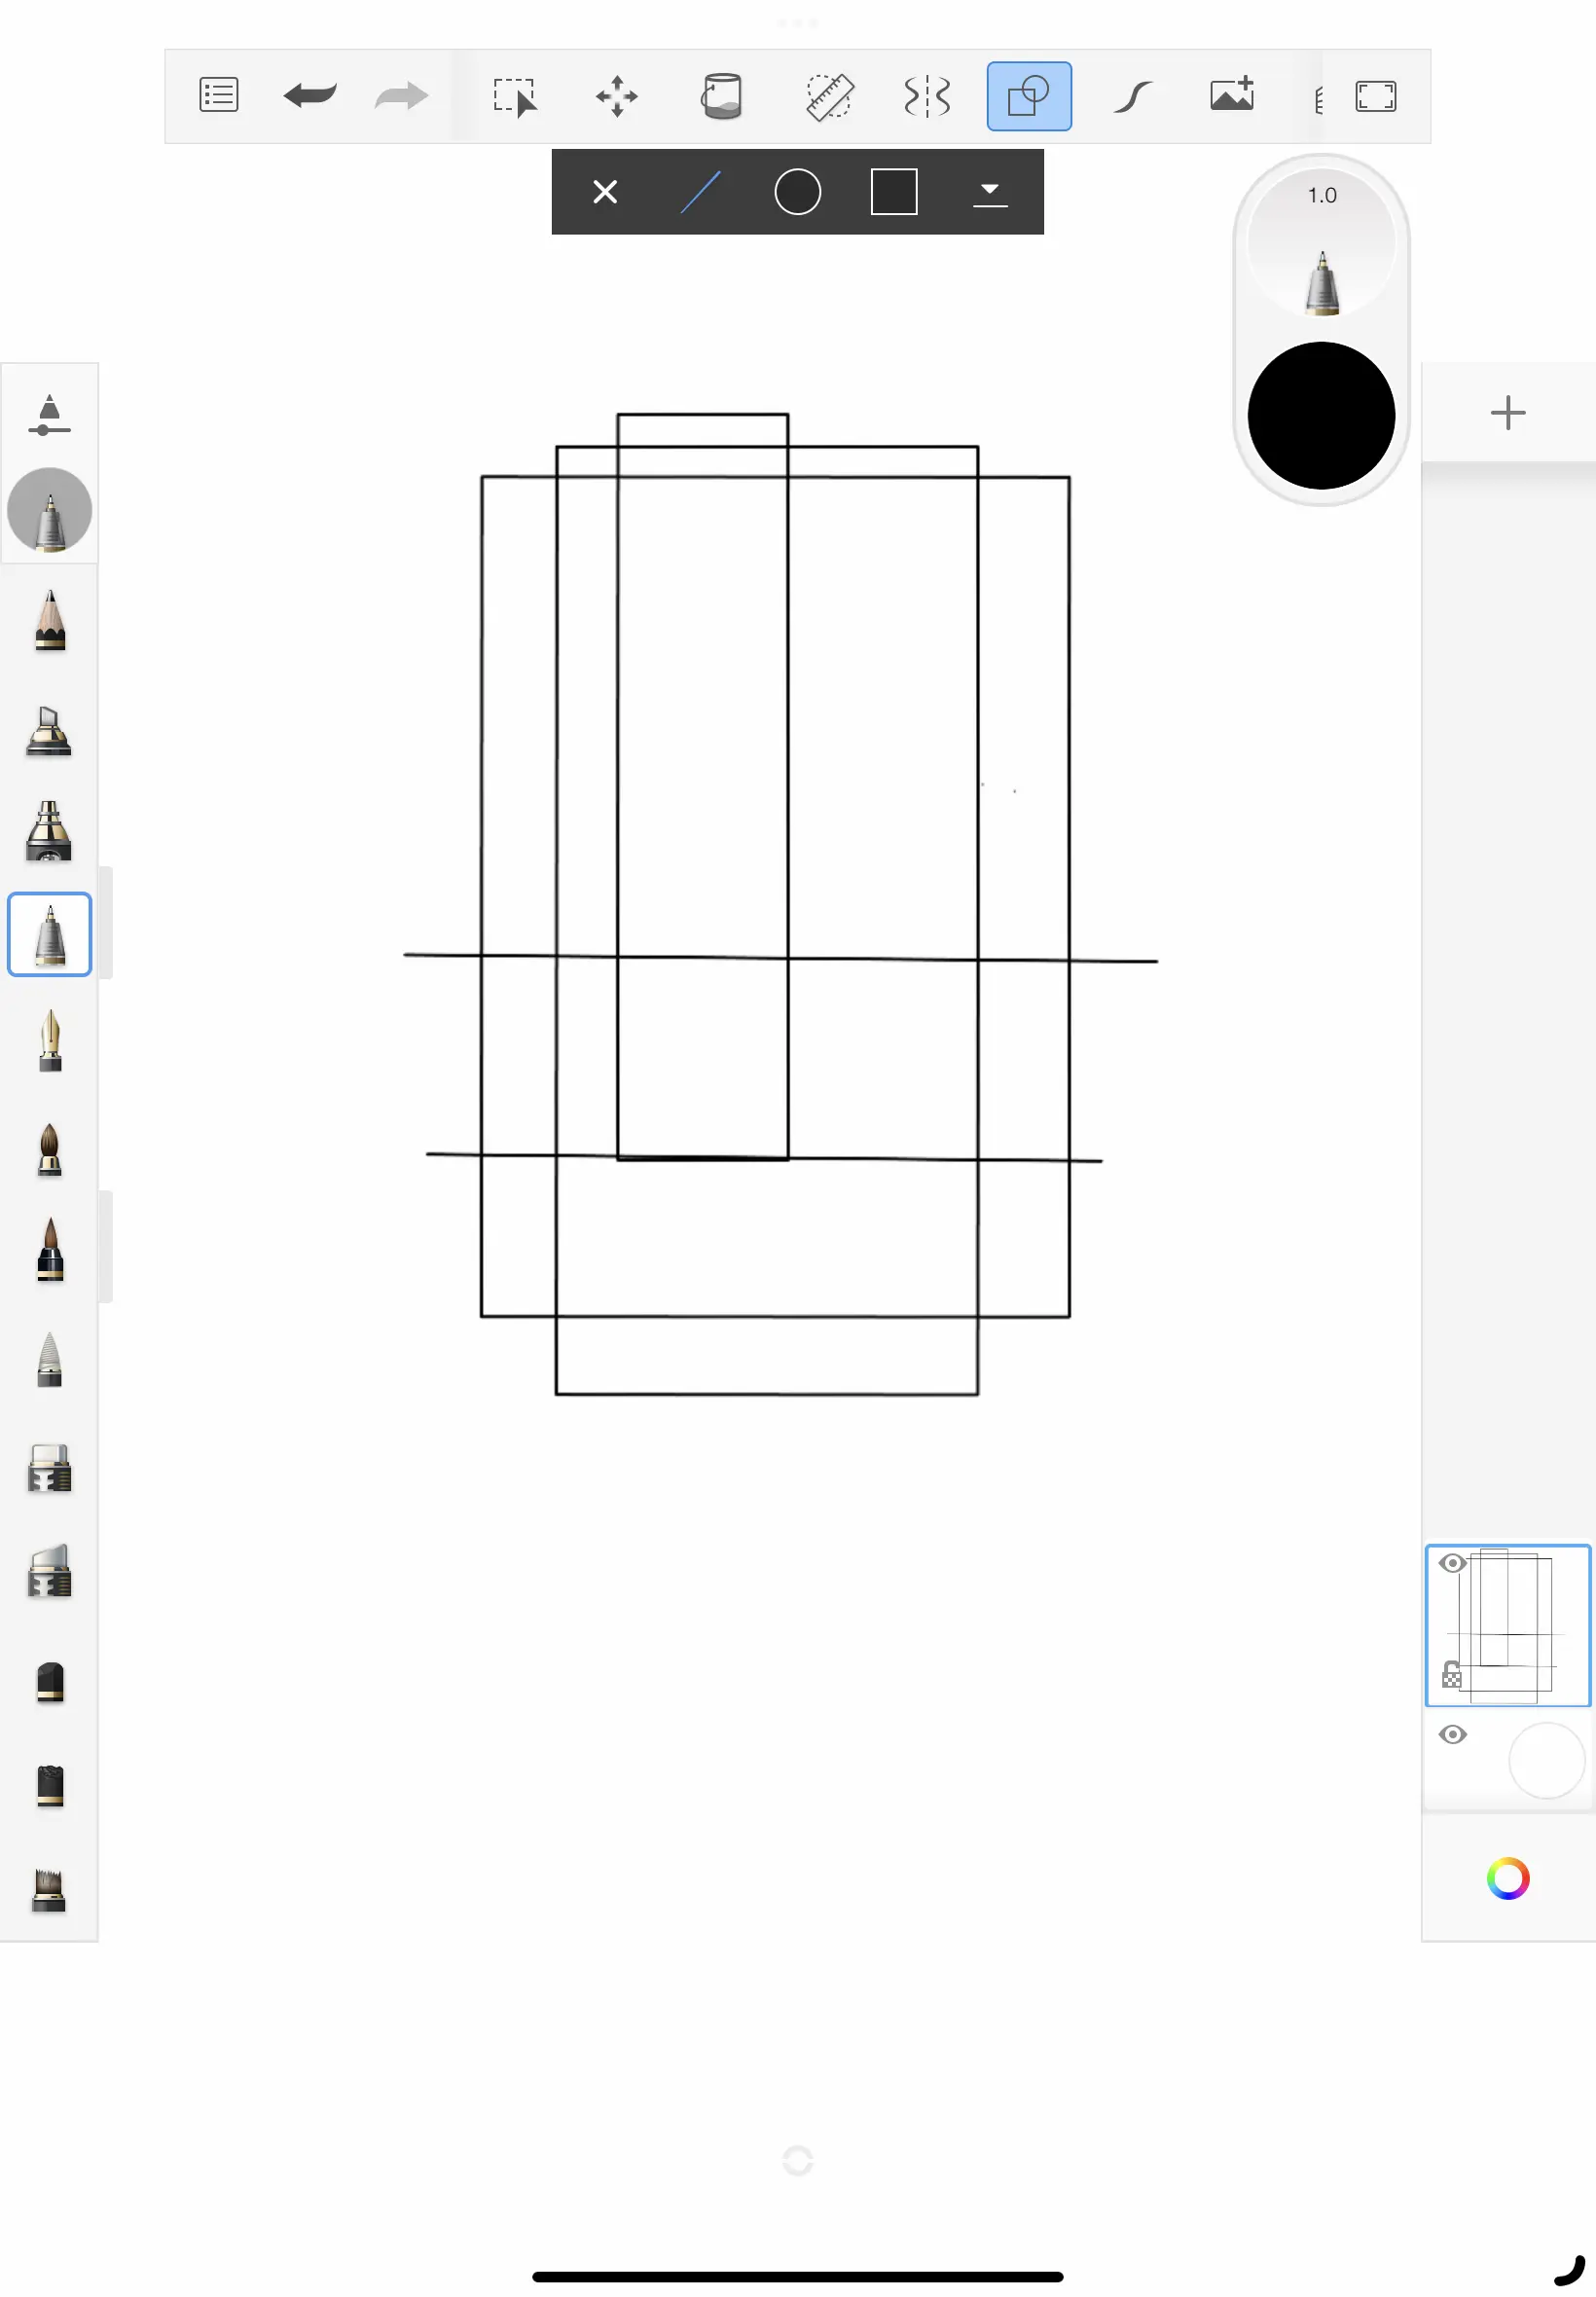
Next, add rough lines within these rectangles, approximating where the upper edges of the stem leaves intersect with the rose petals in the image, and considering the angles at which the petals change.
Feel free to introduce additional lines or shapes that aid in your drawing process. Additionally, I included some extended lines at the base to mark where I want the stem to start and where the upper part of the stem leaves will open up.
For those working digitally, after creating these lines, consider reducing the opacity of your current layer to make it lighter. Then, create a new layer for your drawing. It may also be helpful to lock the guiding lines layer. When your artwork is complete, you can hide this layer by clicking the eye icon, leaving only your upper layers’ drawing visible.
Step 2
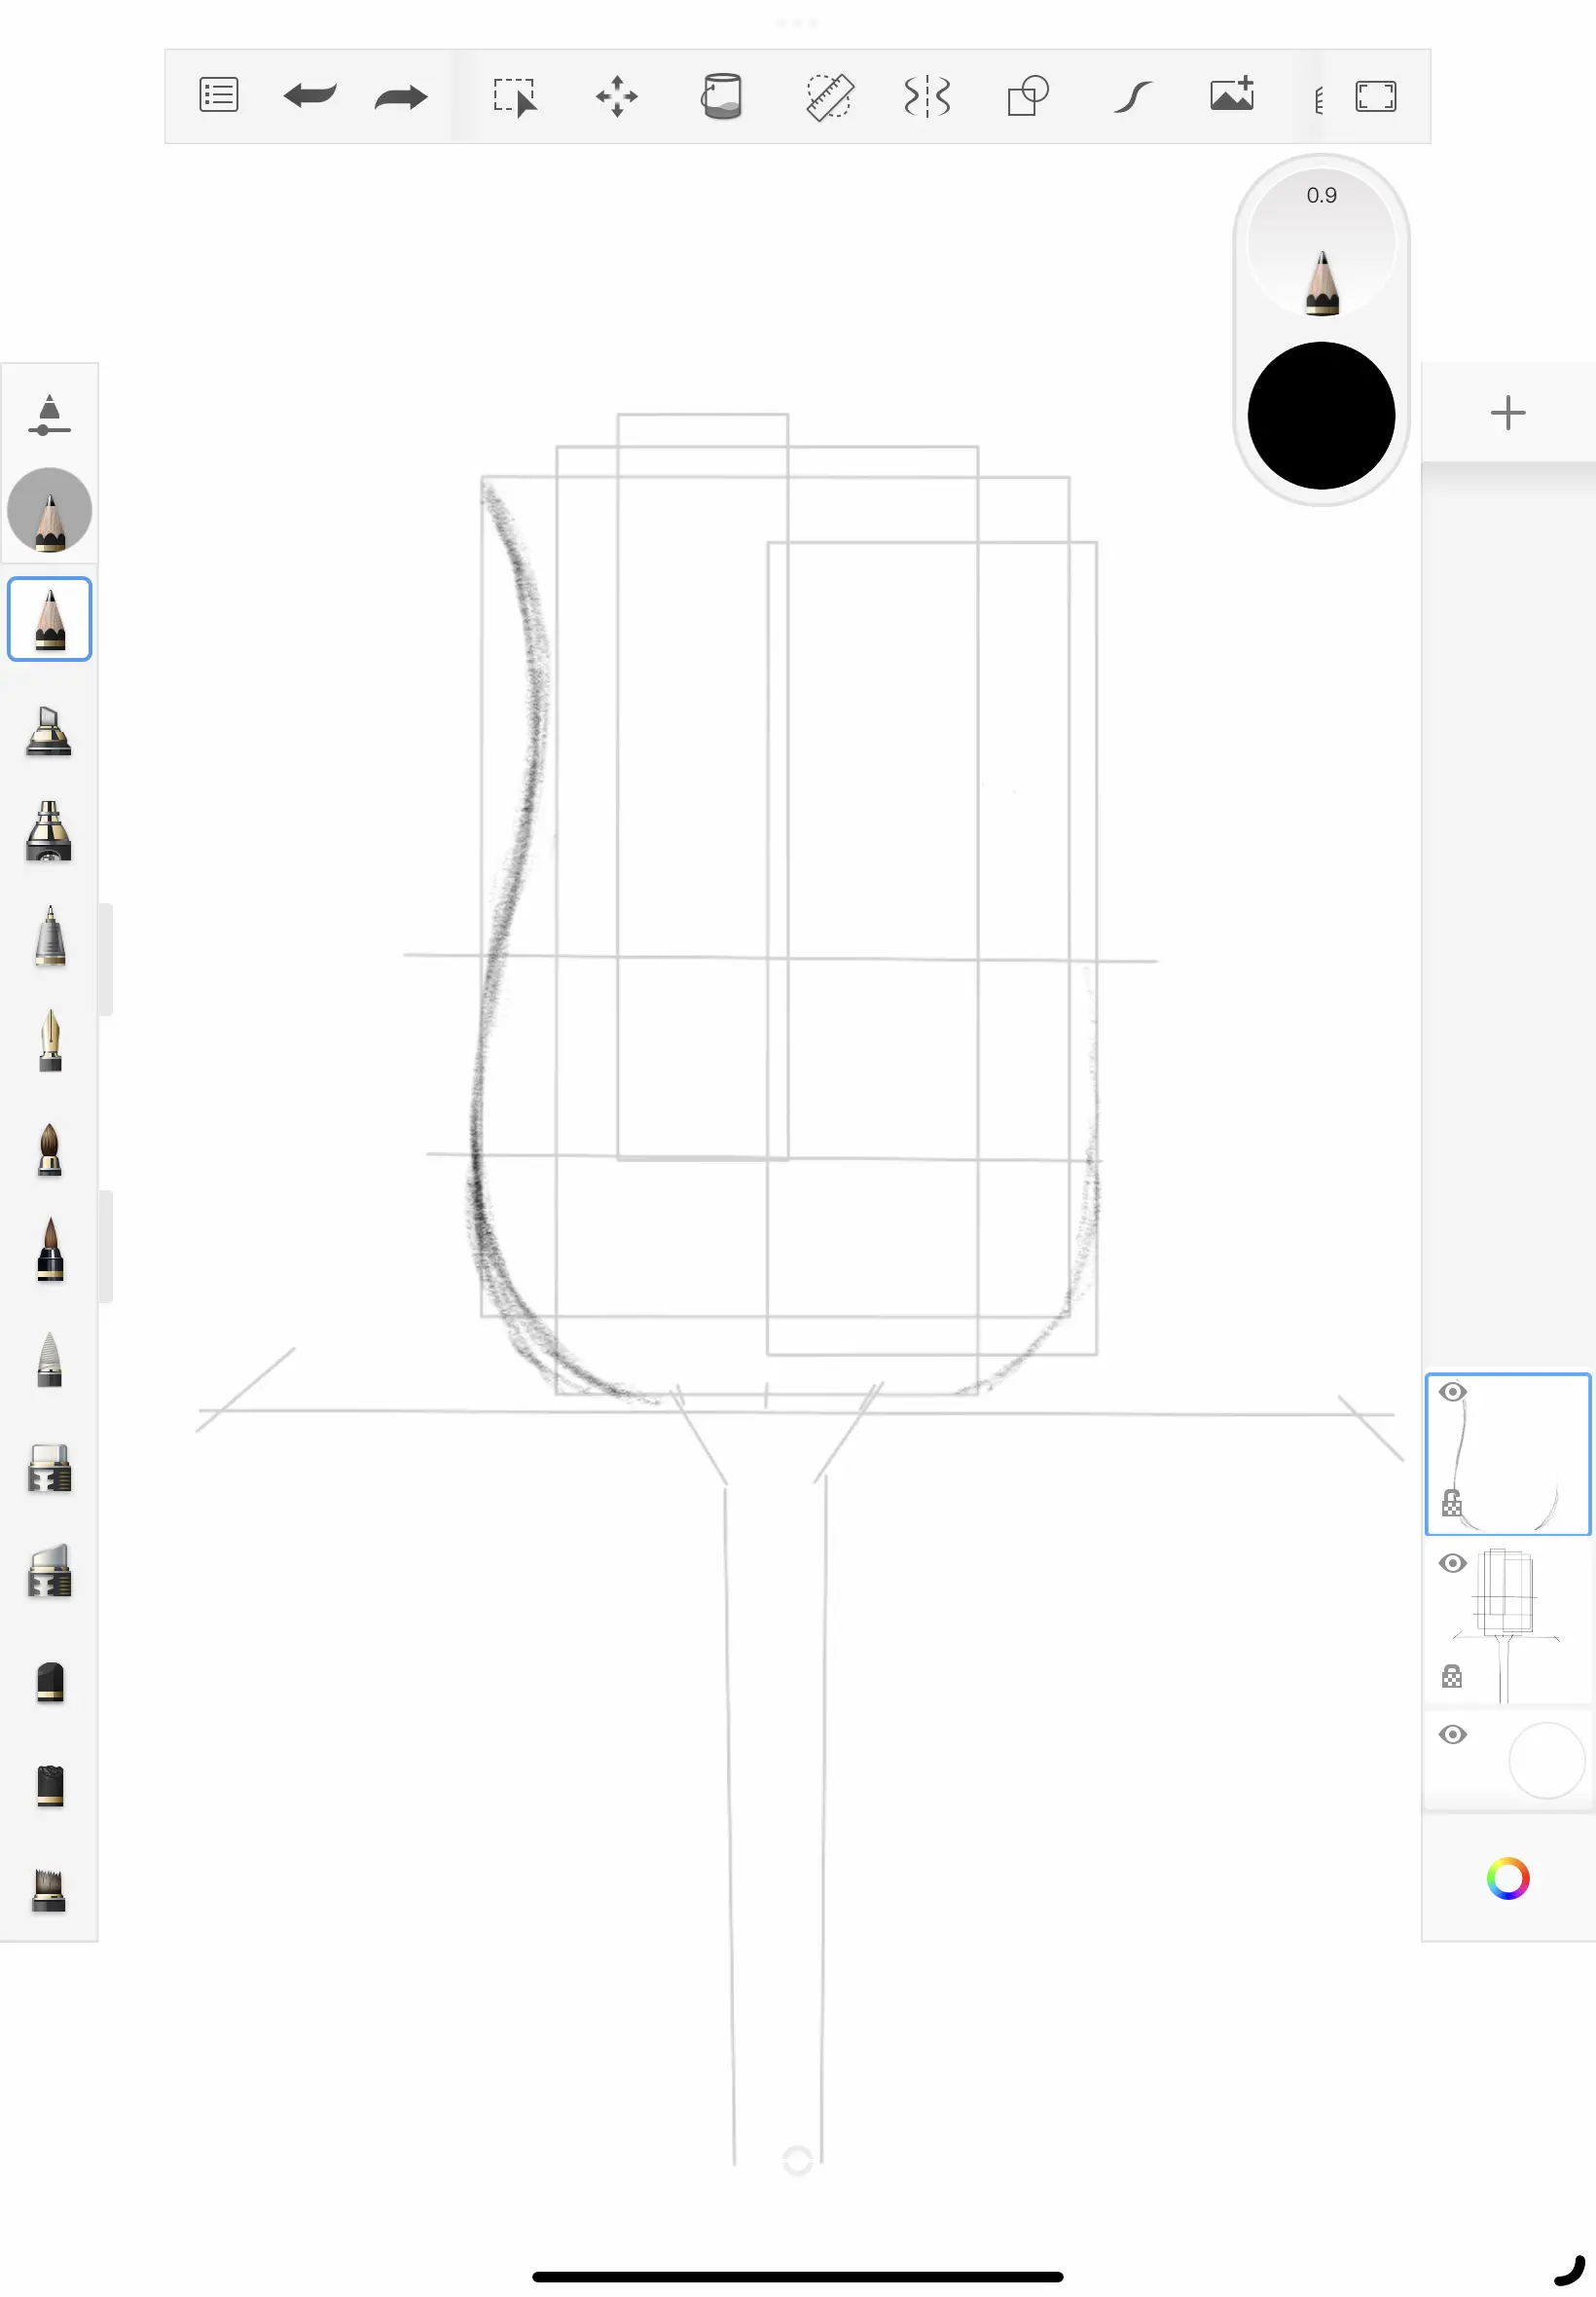
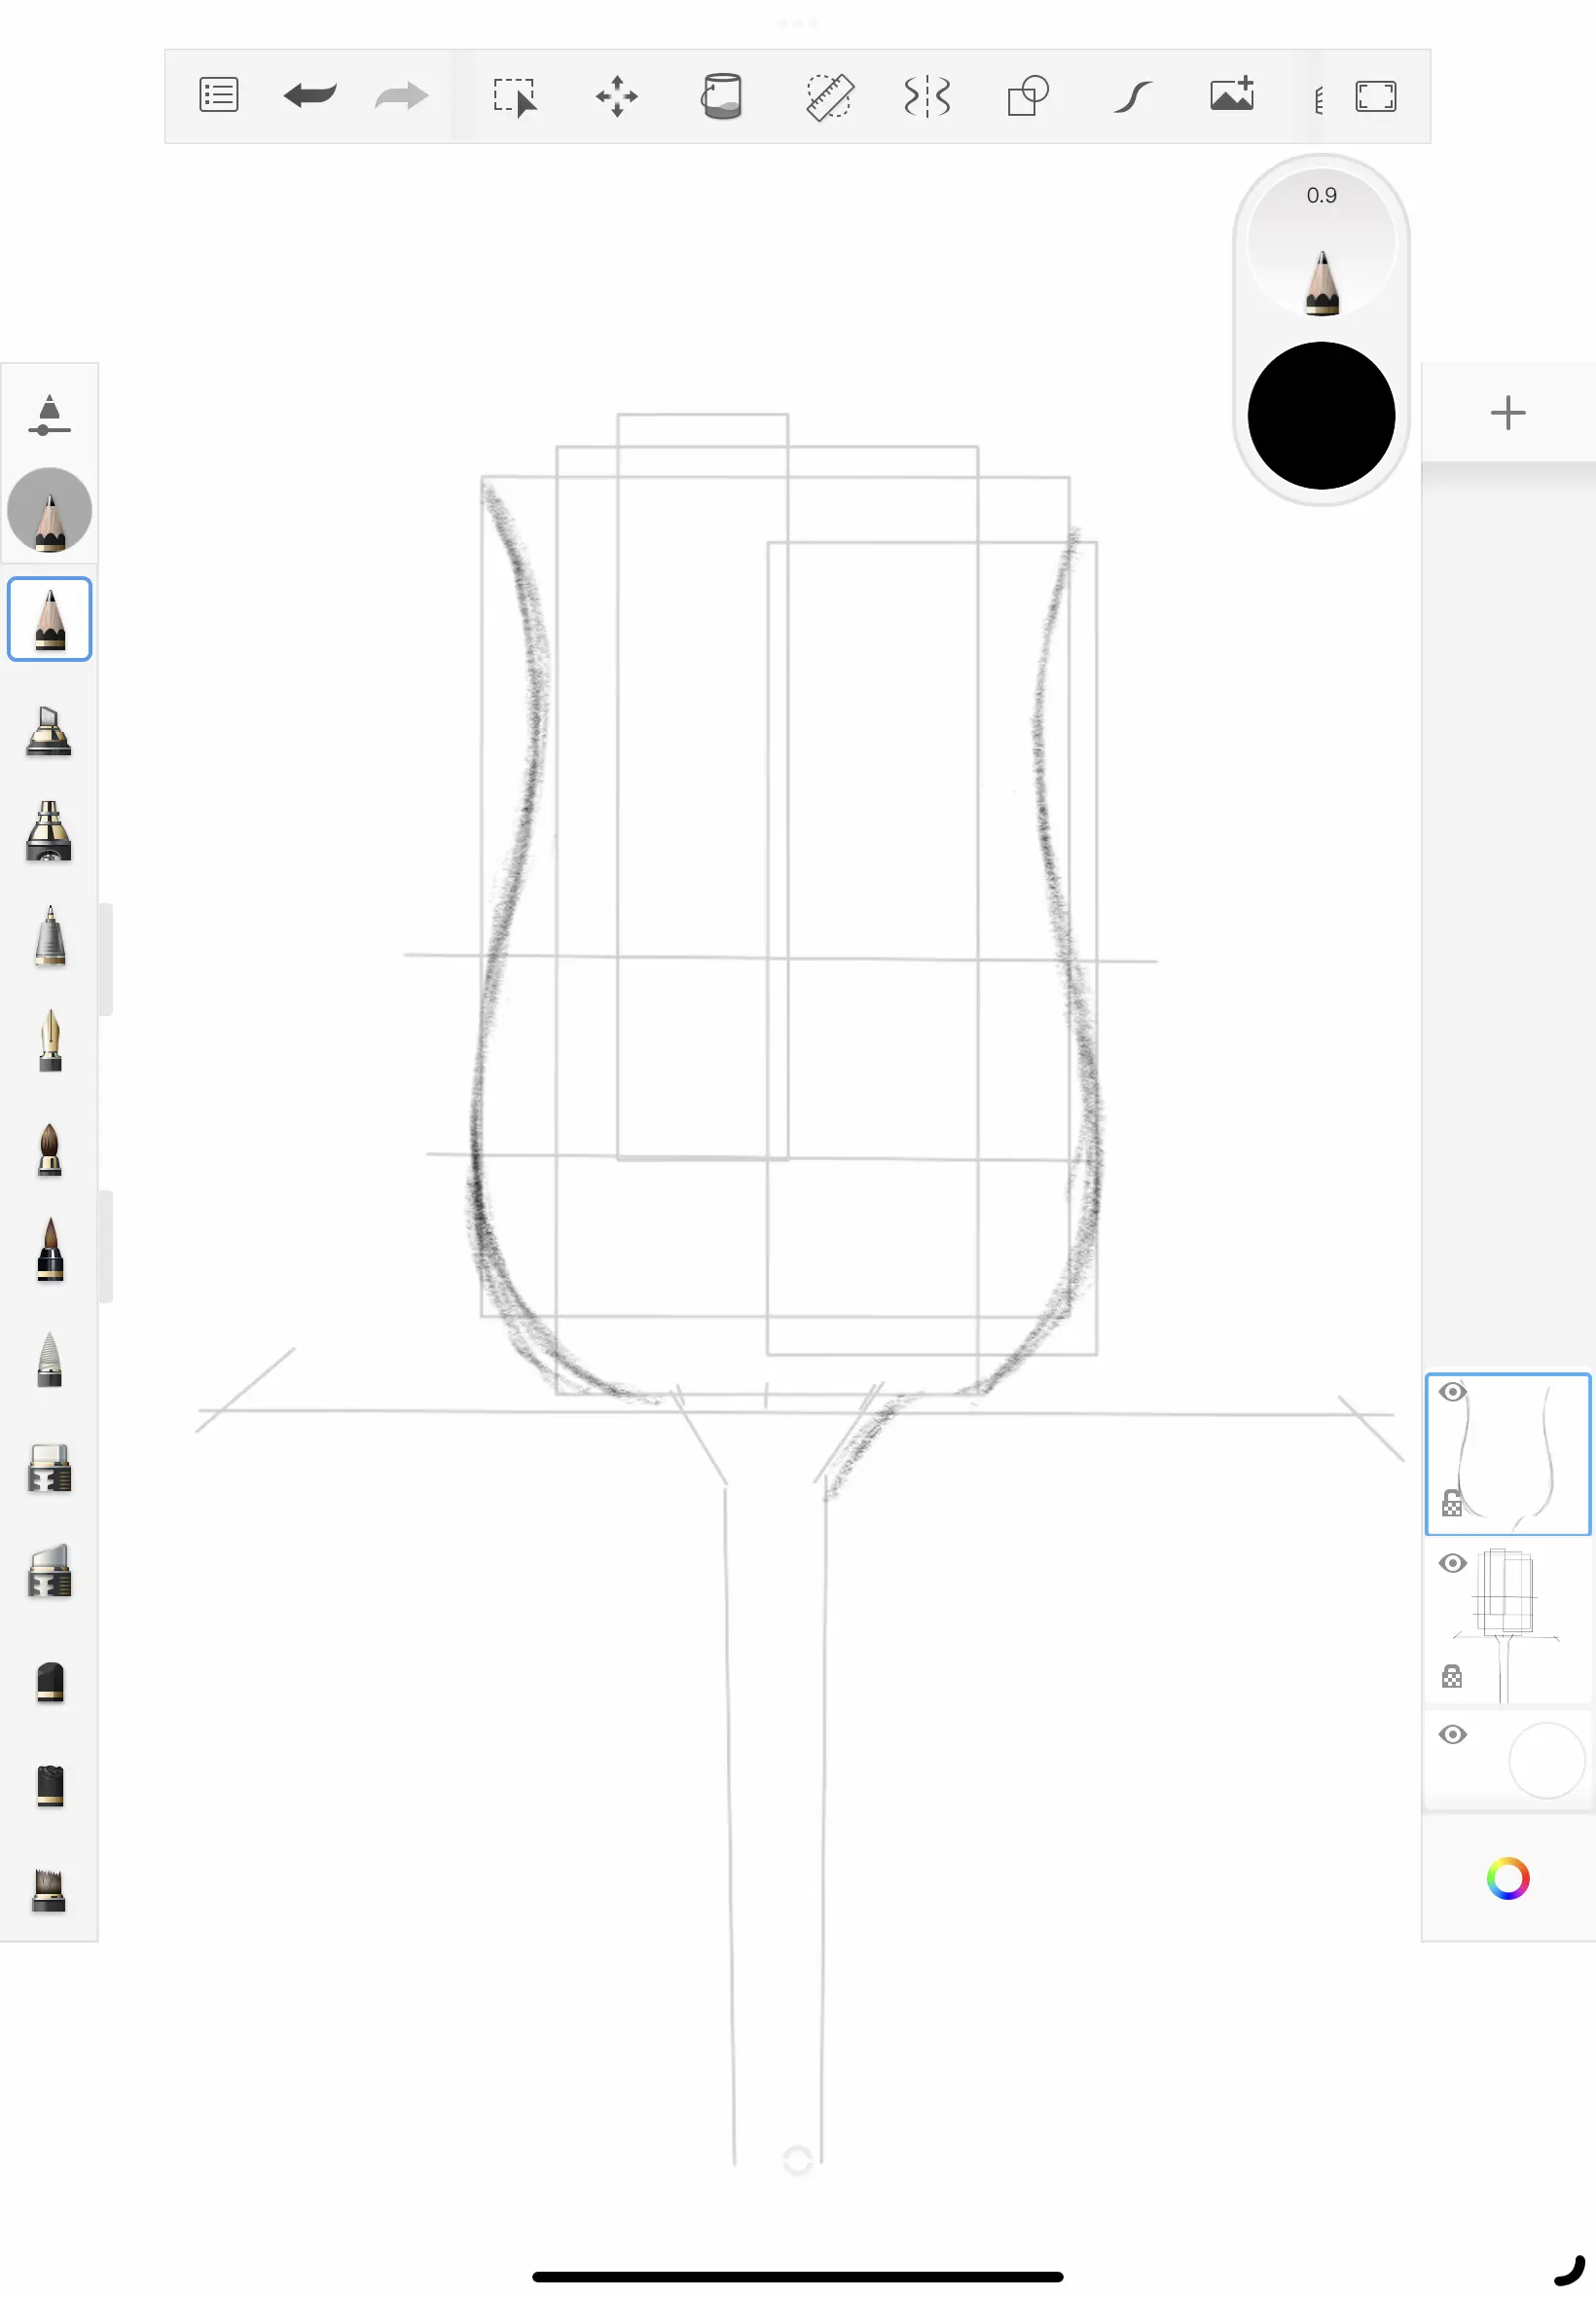
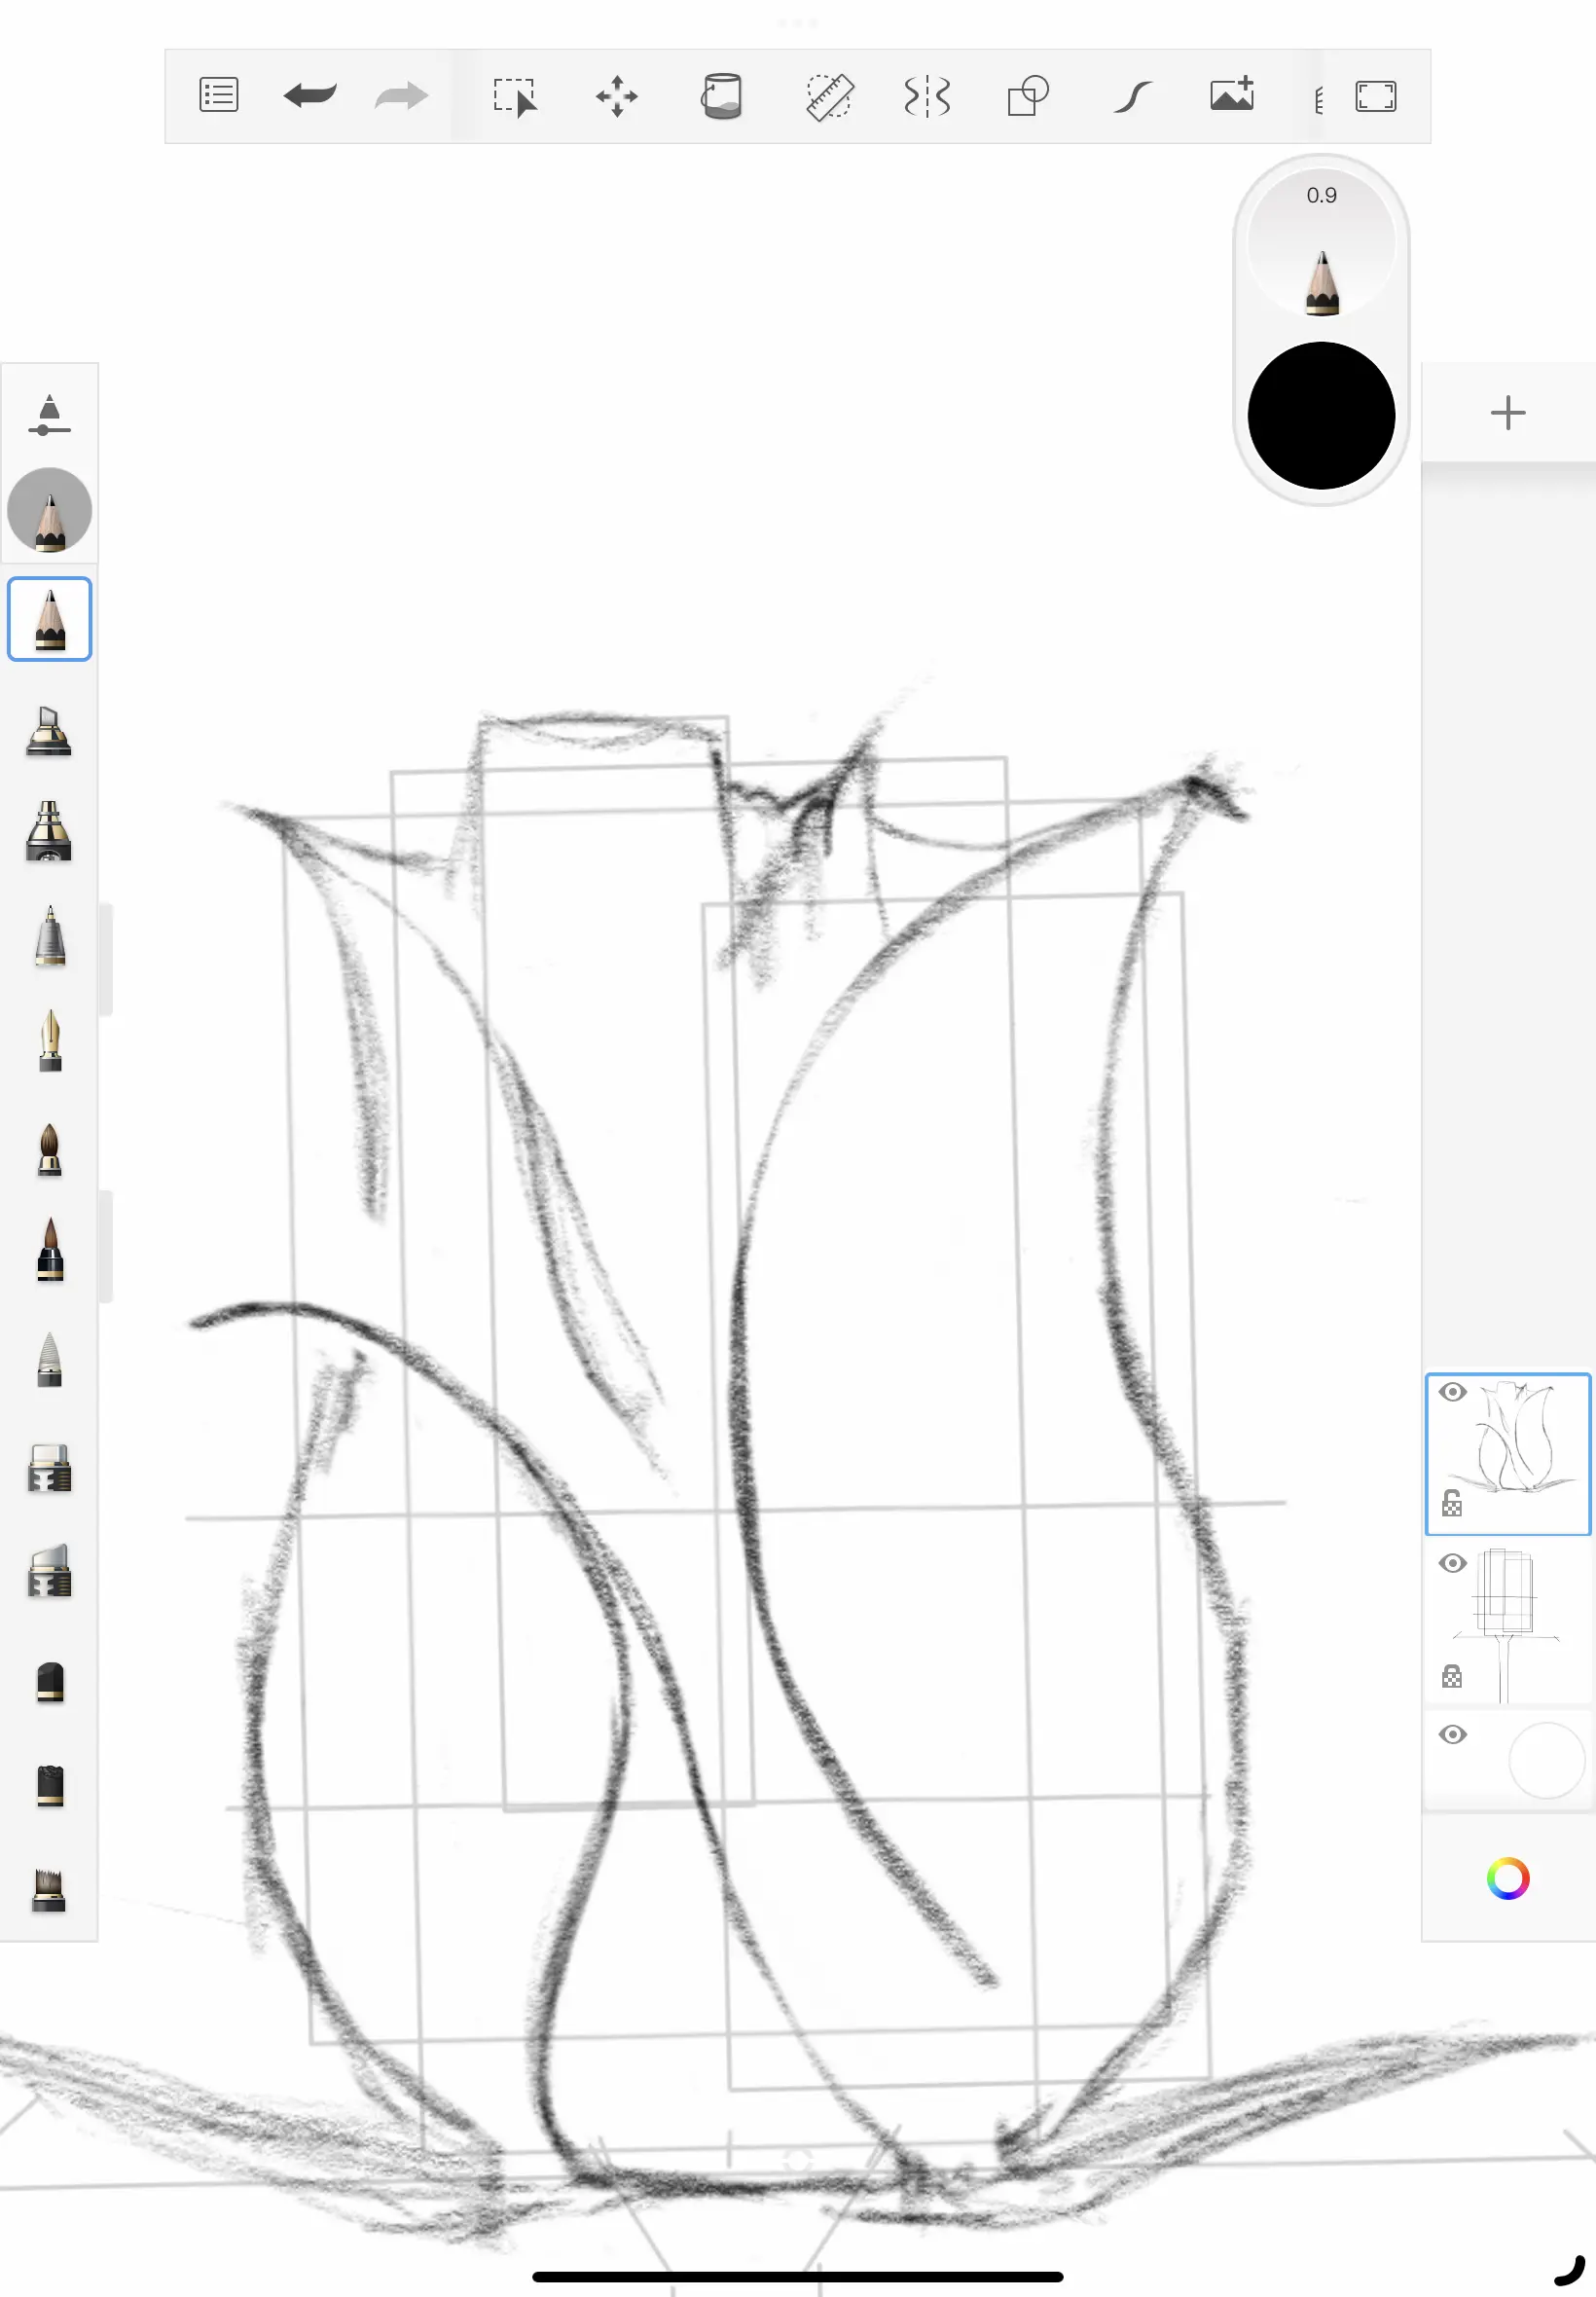
Let’s continue by drawing a gently curving line down the left side, resembling the one depicted in the image above. Ensure you refer to the layer below (if digital) or the lightly drawn lines you’ve previously created if working with a pencil.
Following that, sketch another slightly curving line on the right side of the flower, akin to the example provided. These lines will establish the outer shape of your flower.
Important Note: Don’t overly concern yourself with drawing perfectly straight lines or flawlessly arched curves. Many artists, including myself, often struggle to achieve absolute precision in their lines or curves. It’s important to remember that what might be perceived as ‘mistakes’ in artwork can contribute to its quality and character, making each piece unique and intriguing. However, if you require a perfectly straight line, consider using a ruler, the edge of a book, or a similar straight-edge tool when working on paper. When using digital drawing software, most programs offer tools for creating straight lines. Regardless of your medium, you can often return later to make slight adjustments to your lines for refinement. In short, be forgiving of yourself when making mistakes, as they can also be the bases for varying avenues for your creativity.
Step 3
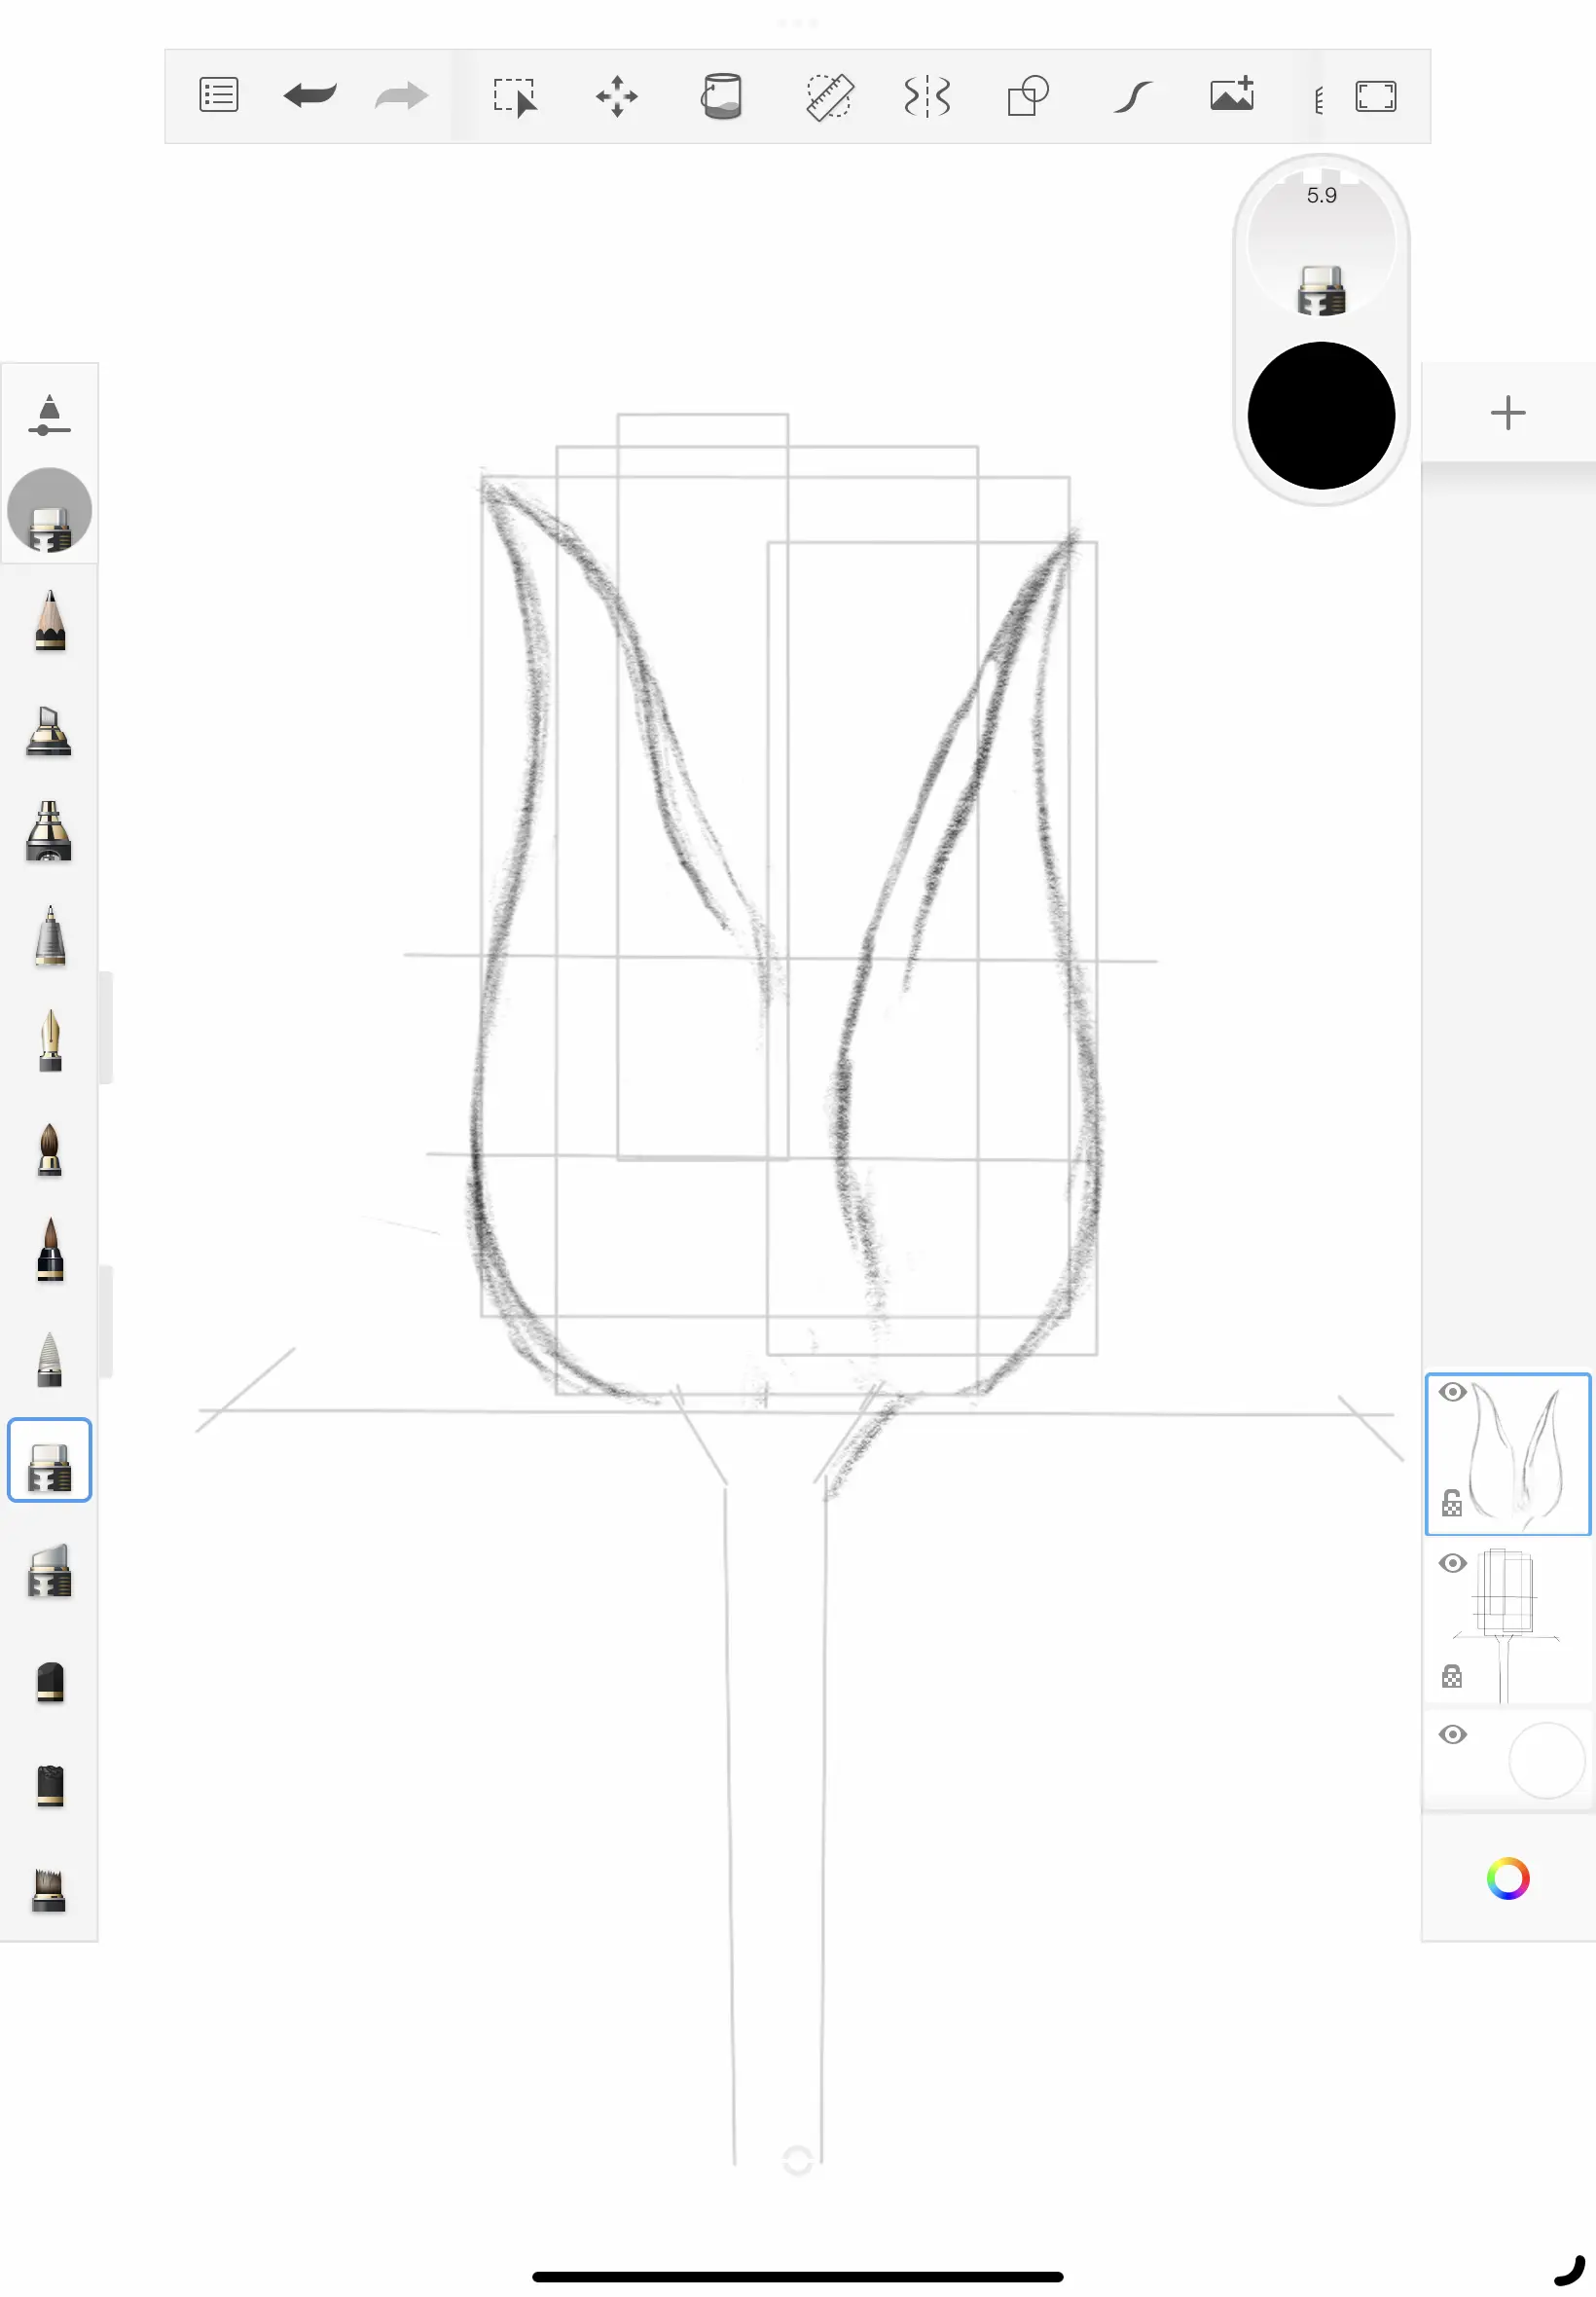
Now, let’s focus on enhancing the definition of those two outer rose petals. Begin by carefully drawing slow, curving lines that extend towards the center area. These lines represent the inner edges of the exterior petals. Additionally, include two more lines, nearly parallel to the inner angled lines, to mimic the gently folded edges of the flower’s petals that unfurl outward.
Once you’ve completed adding these internal petal lines, we can proceed to draw the stem leaf that lies in front of the rose petals. Remember to refer to your reference image as needed and make adjustments accordingly.
Step 4
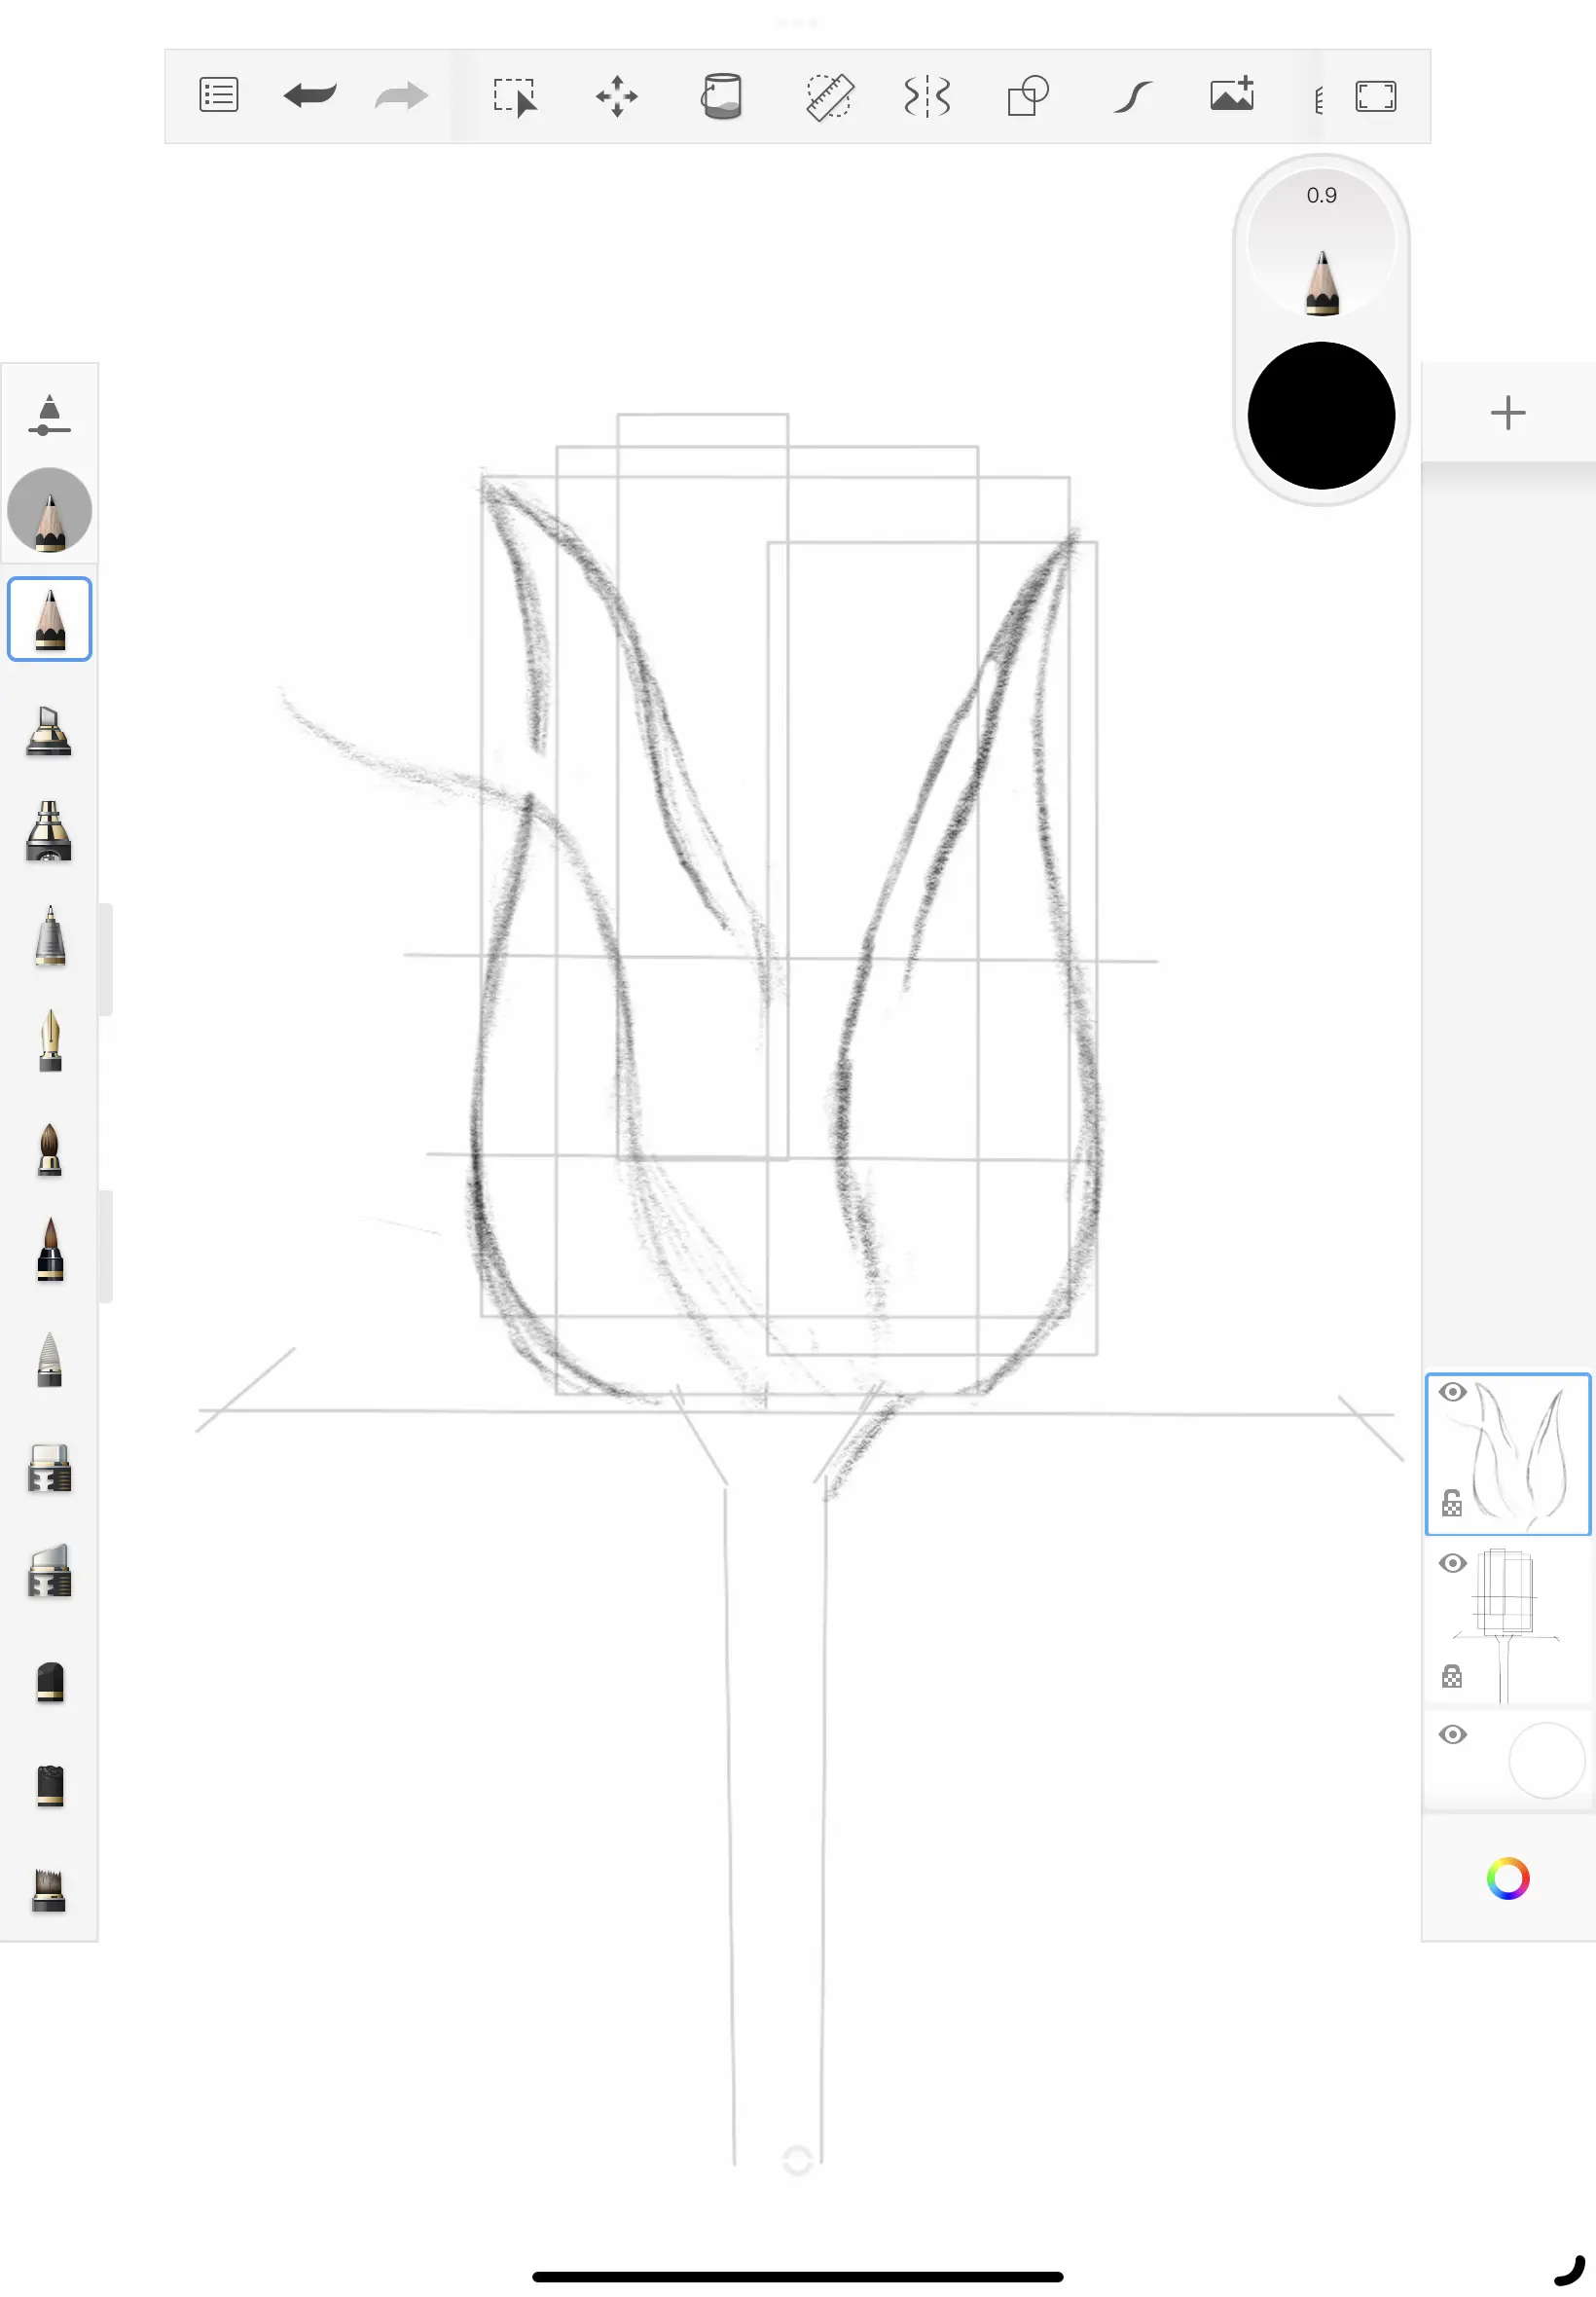
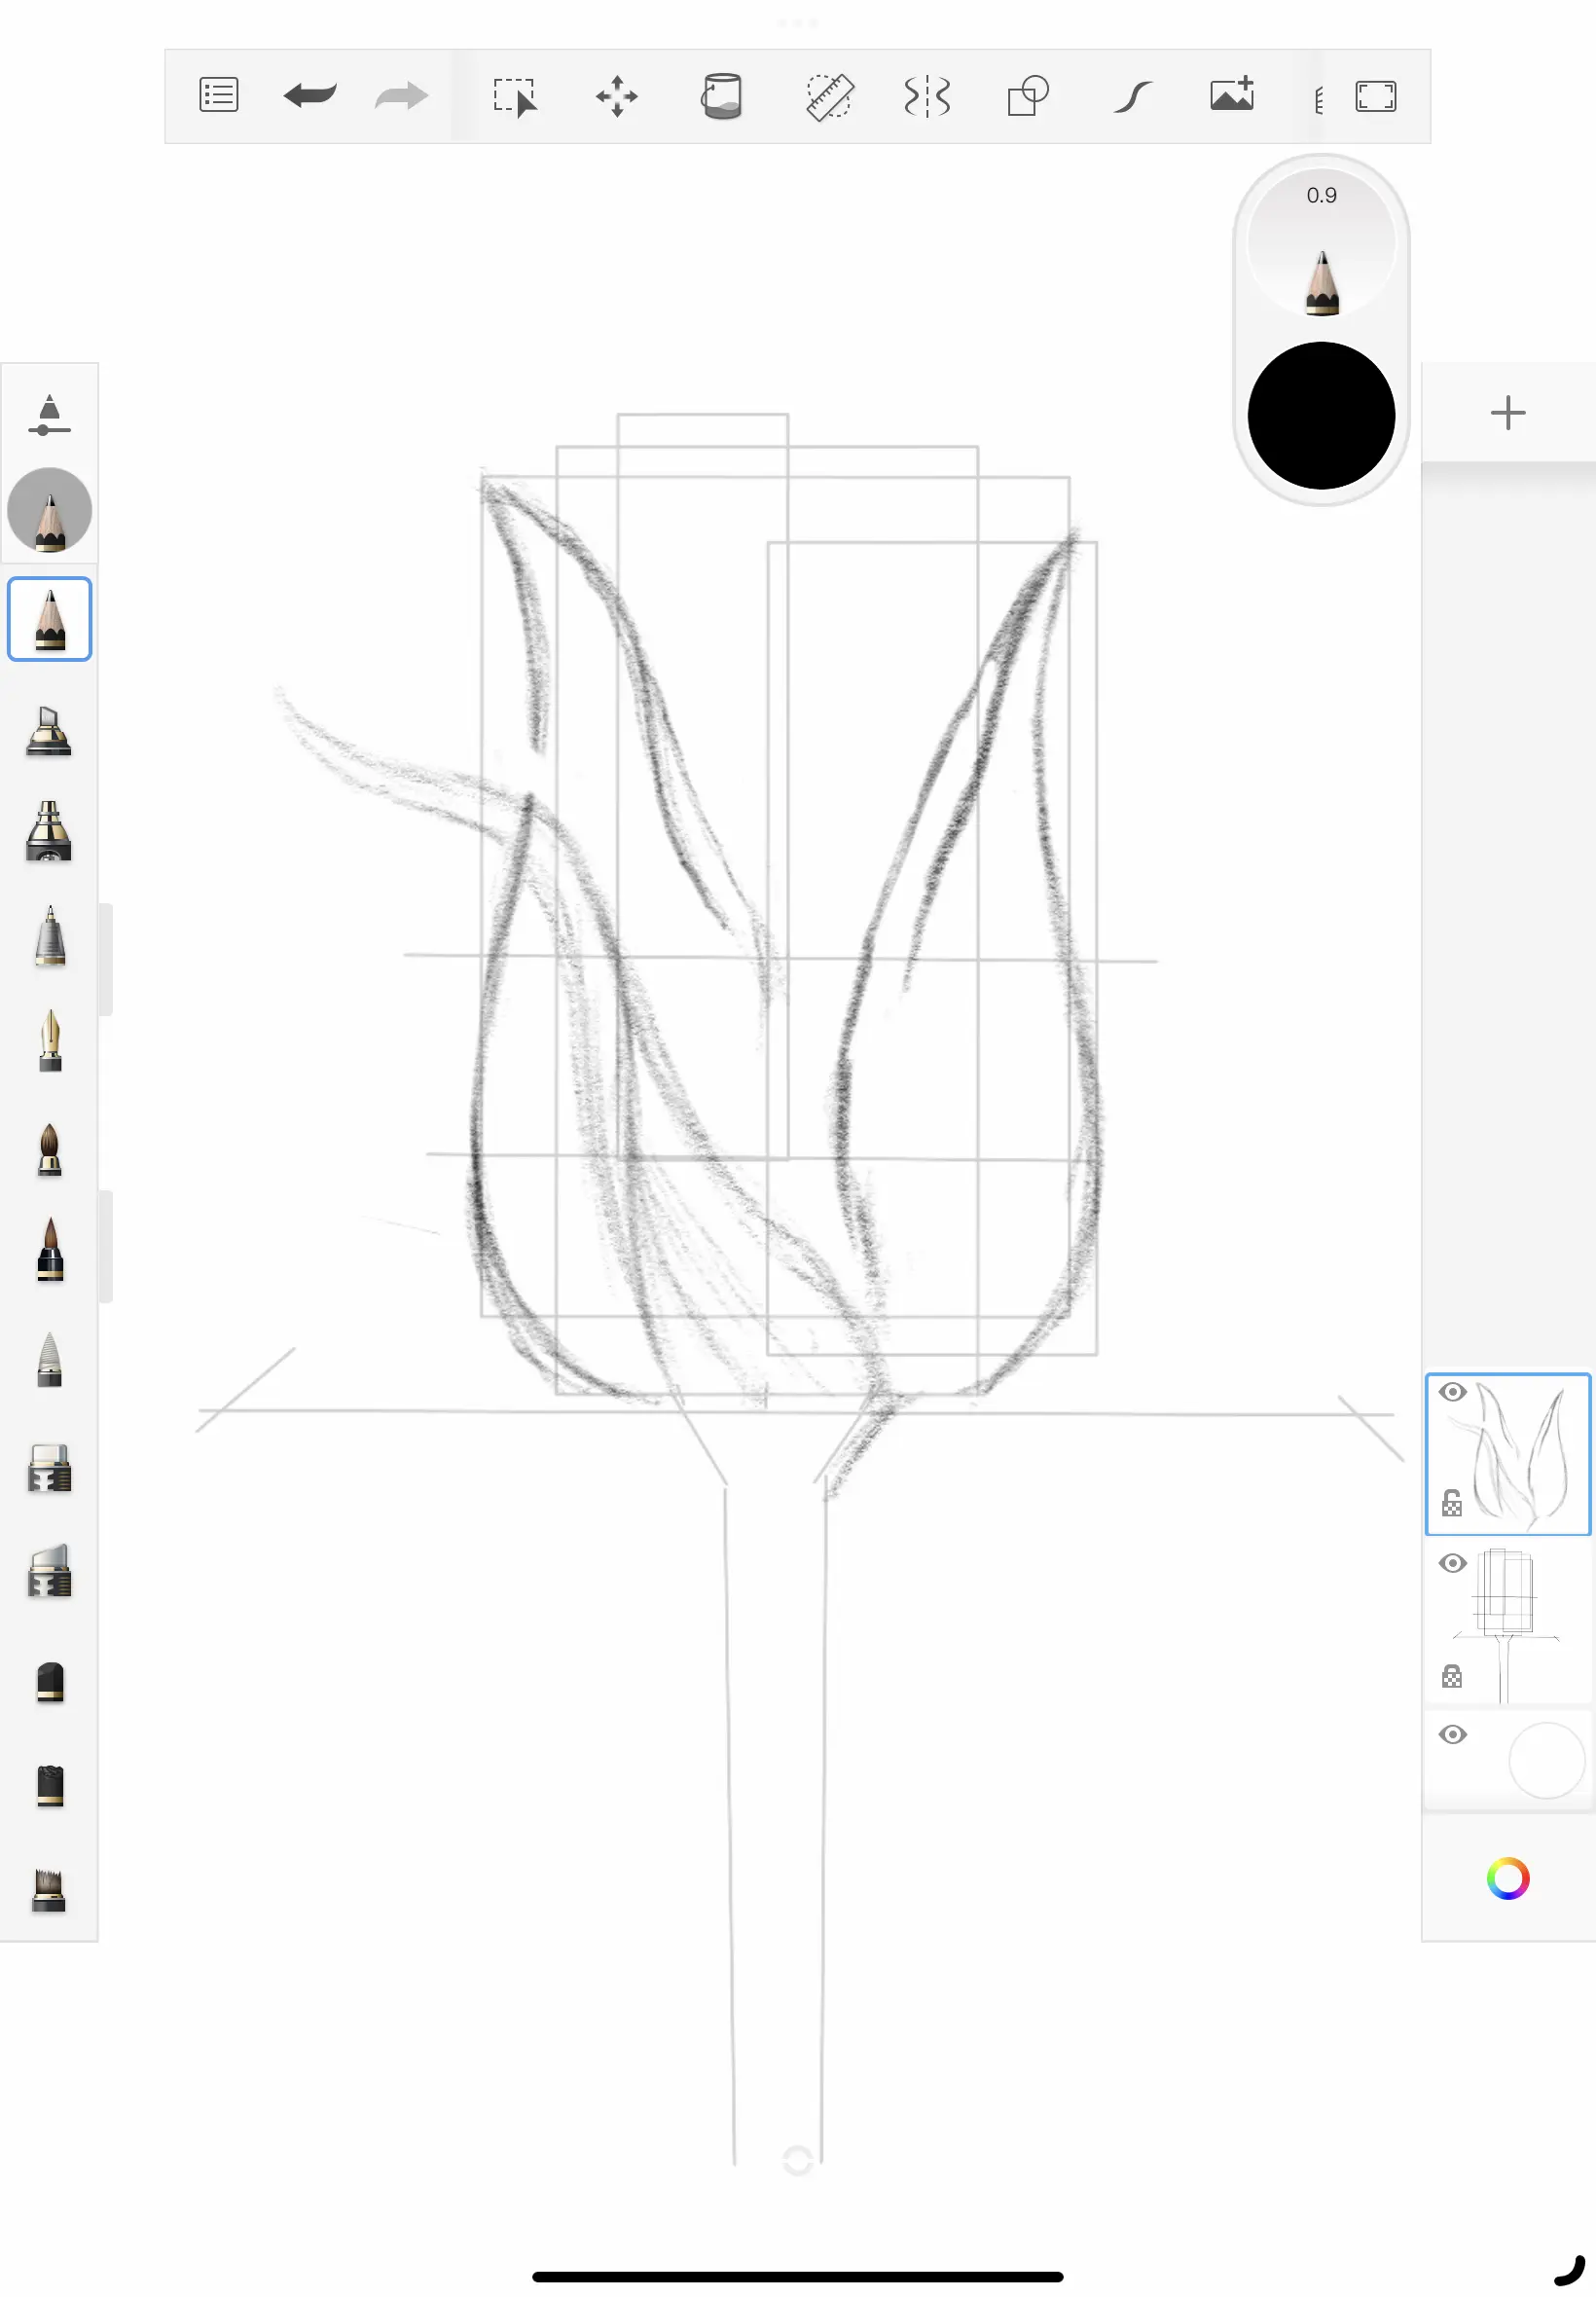
Now, let’s focus on refining and touching up certain areas. As you can see, I’ve made various modifications to the central stem leaf, and I’ve included these screen captures to illustrate that the creative process in any art project isn’t always perfect. It’s important to be prepared to revisit and adjust areas you’re not entirely satisfied with.
For instance, I’ve erased portions of the central stem, thickened it, and adjusted its curvature. If you’re using a tablet or digital tools to draw, consider zooming in on specific objects to achieve smoother lines or to tidy up areas.
In the second and third images above, you can also see that we’re beginning to incorporate the stem leaves extending from both the left and right sides of the flower petals. As you progress, you’ll notice the drawing coming together more and more.
Step 5
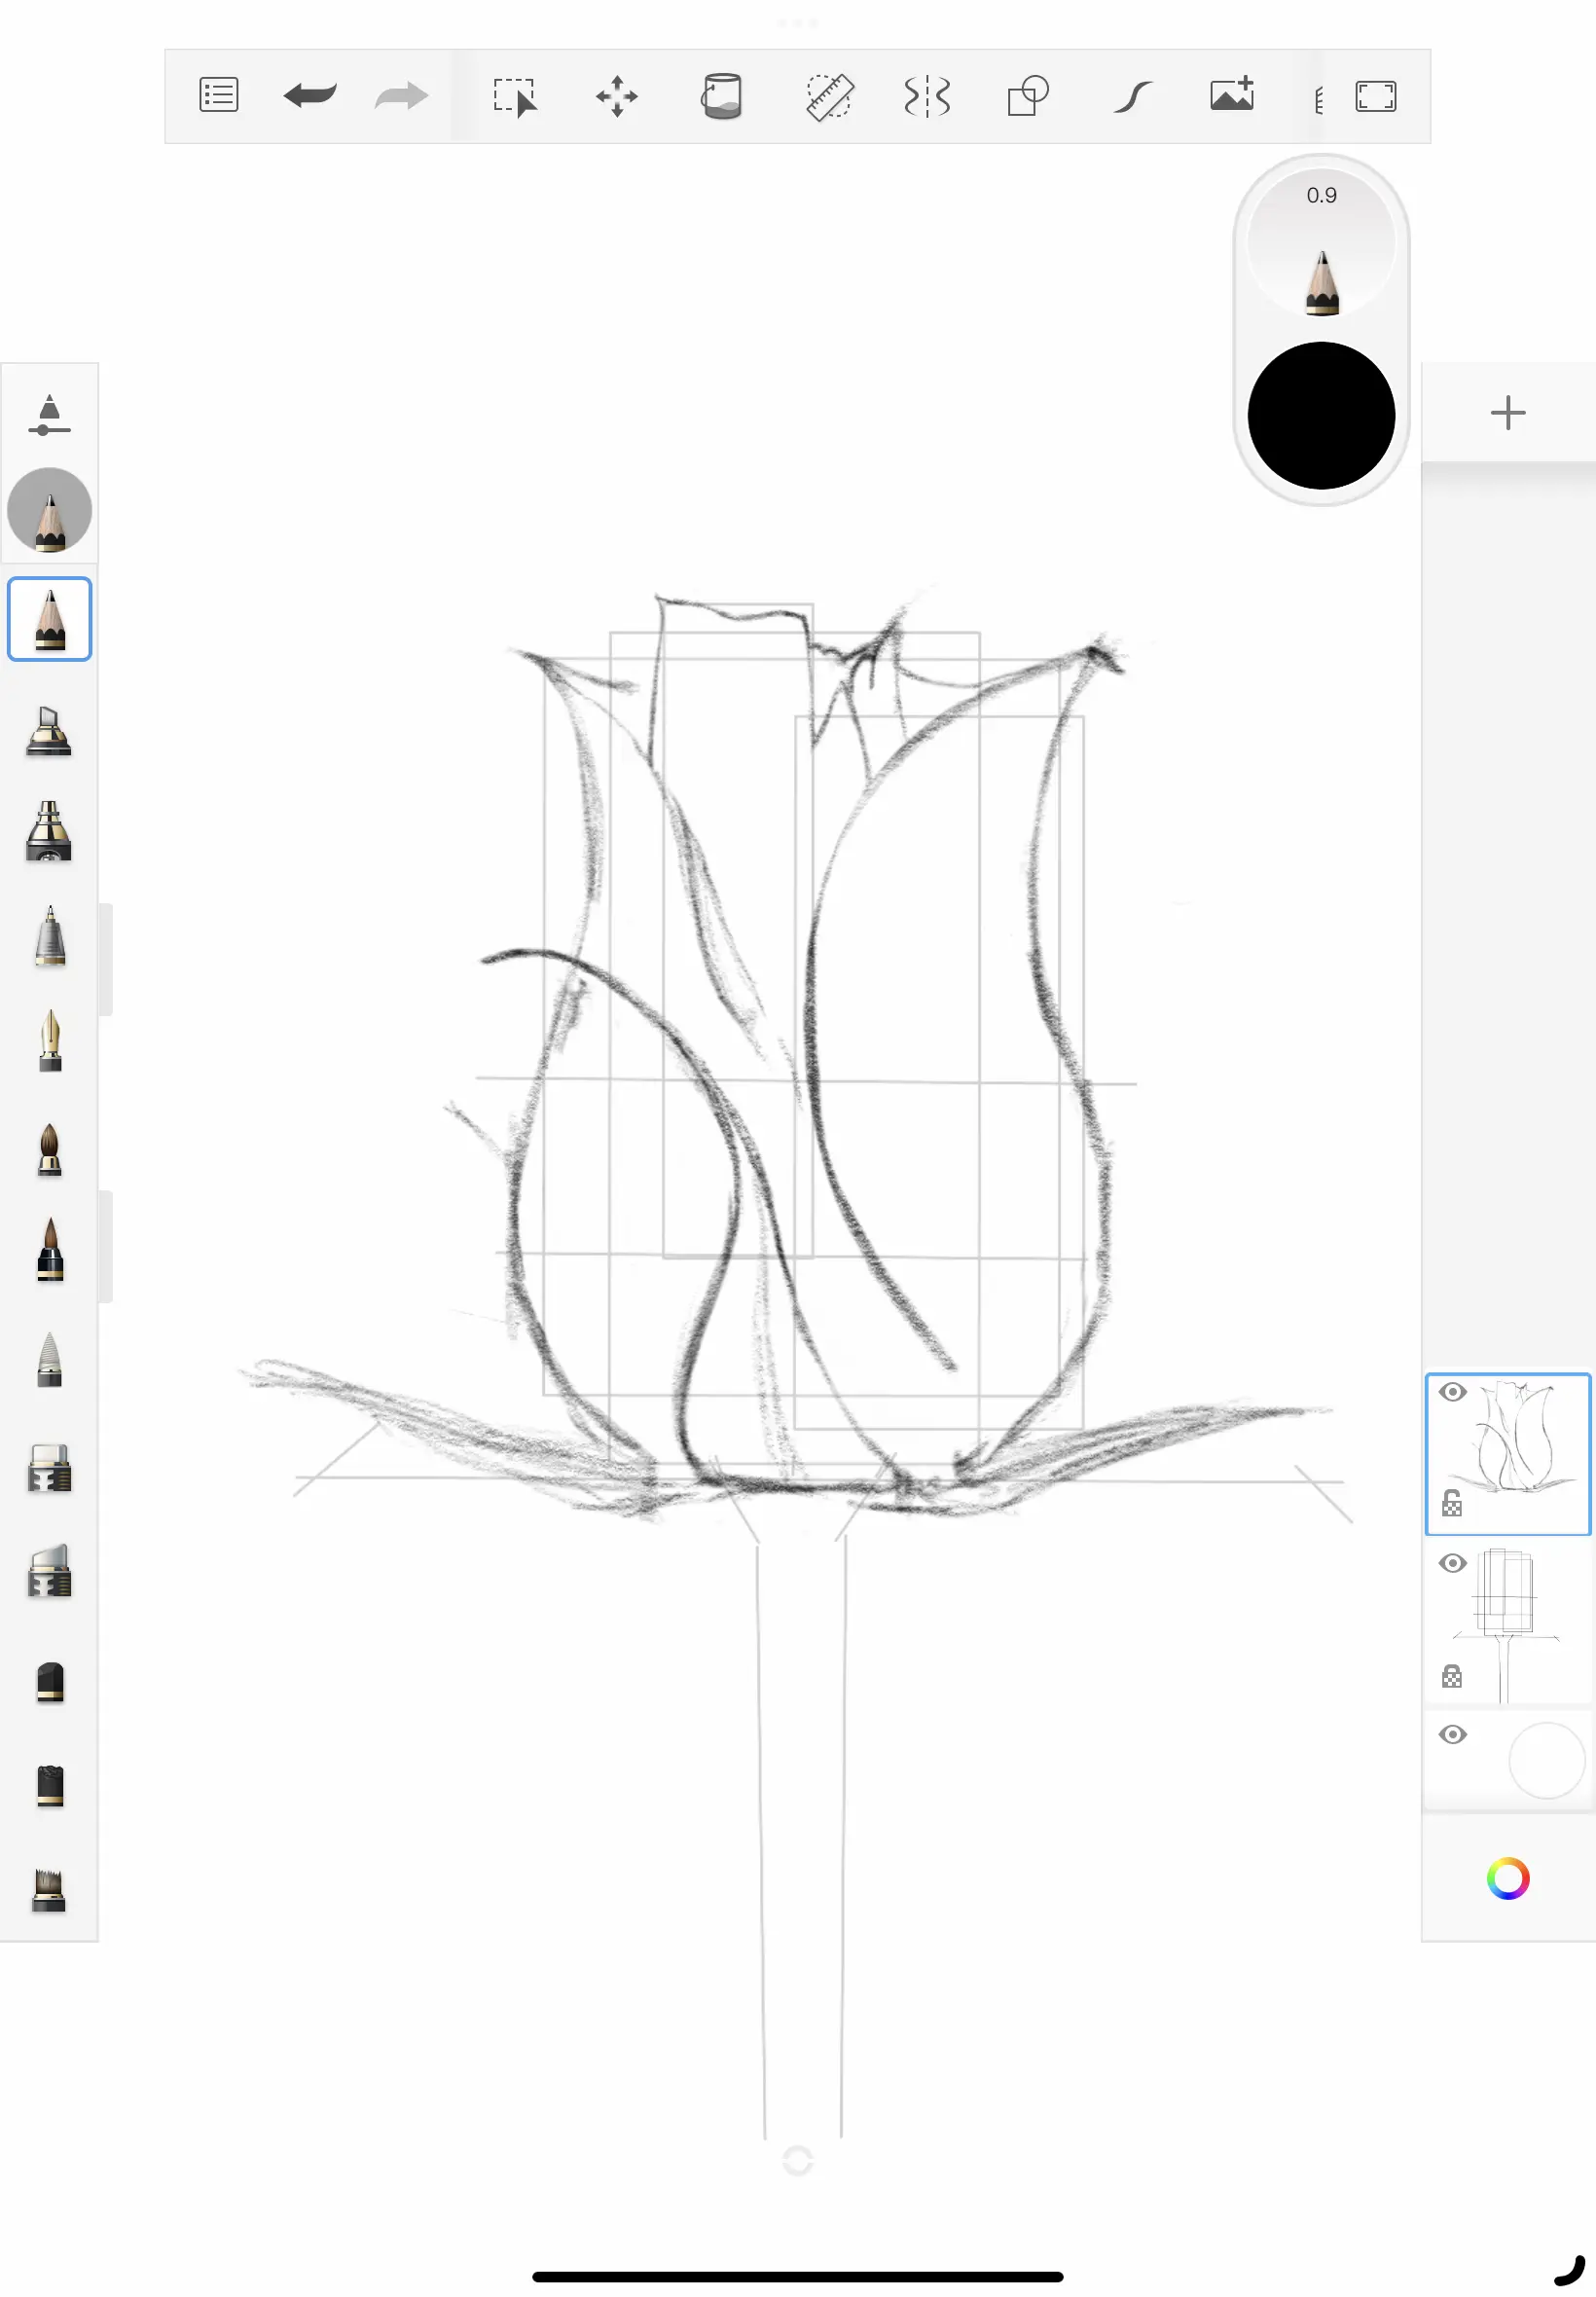
Now, let’s focus on enhancing the definition of those two outer rose petals. Begin by carefully drawing slow, curving lines that extend towards the center area. These lines represent the inner edges of the exterior petals. Additionally, include two more lines, nearly parallel to the inner angled lines, to mimic the gently folded edges of the flower’s petals that unfurl outward.
Once you’ve completed adding these internal petal lines, we can proceed to draw the stem leaf that lies in front of the rose petals. Remember to refer to your reference image as needed and make adjustments accordingly.
Step 6
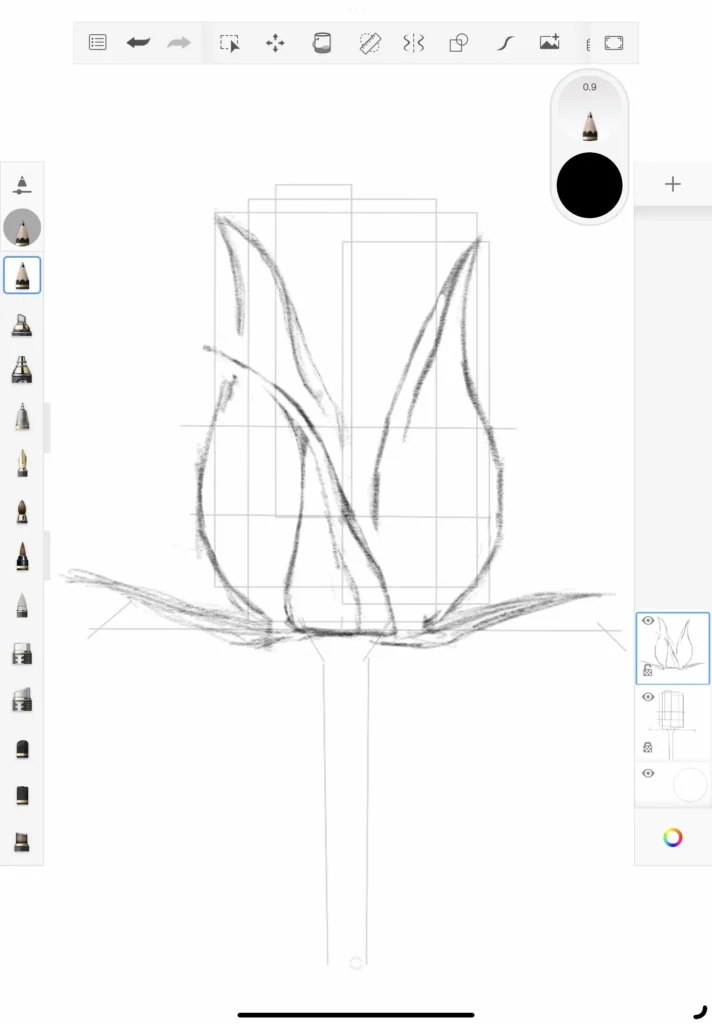
Now, let’s introduce the stem beneath the flower petals while also refining some of the leaves and stem leaves. If you’re working digitally, consider zooming in and adjusting the size of your pencil and eraser tools to clean up smaller areas little by little. For those using pencil and paper, try employing a different eraser, one designed for more precision work, or experiment with an adjustable eraser or eraser gum, which is particularly useful for charcoal and pencil art.
Remember, when working with pencil and paper, you can still use lighter pencils until you achieve your desired final lines. Once you’re satisfied with the overall composition, you can confidently switch to your preferred darkness or pencil weight for the finishing touches.
Continue refining the flower stem and its leaves, adding more definition. Make gradual adjustments by gently erasing around the edges as you move forward. Keep in mind that this is a creative journey, not a rigid, scientific process. You’re doing a great job, and we’re approaching the final steps.
Step 7
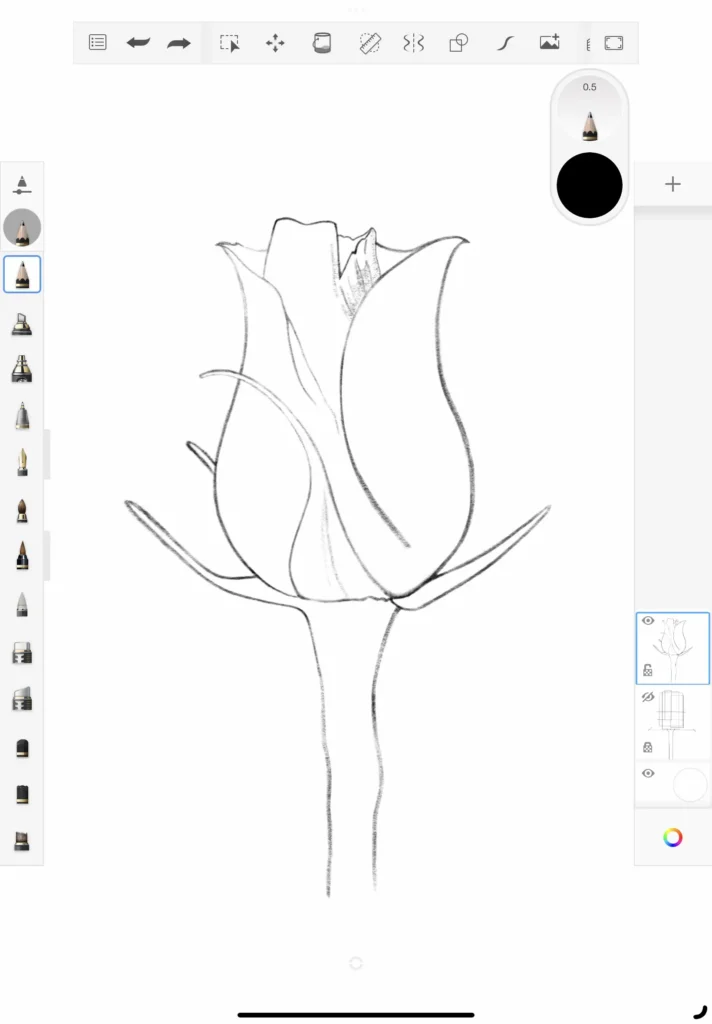
Excellent progress thus far. If you’d like, you can leave the flower as it is. Just tidy up the lines by erasing any smudges or stray pencil marks in undesired areas. Now is the perfect time for you to add whatever color you so desire with color pencils or using your digital software.
However, if you want to add pencil shading lets continue.
Once again, we’ll refer to the original flower photo image. Observe that the light source appears to be coming from the upper left side of the flower. Keeping this in mind, gently sketch the edges of the desired lighter areas. After outlining these edges, lightly add shading to both the illuminated and shadowed sections of the flower, as well as the stem and stem leaves.
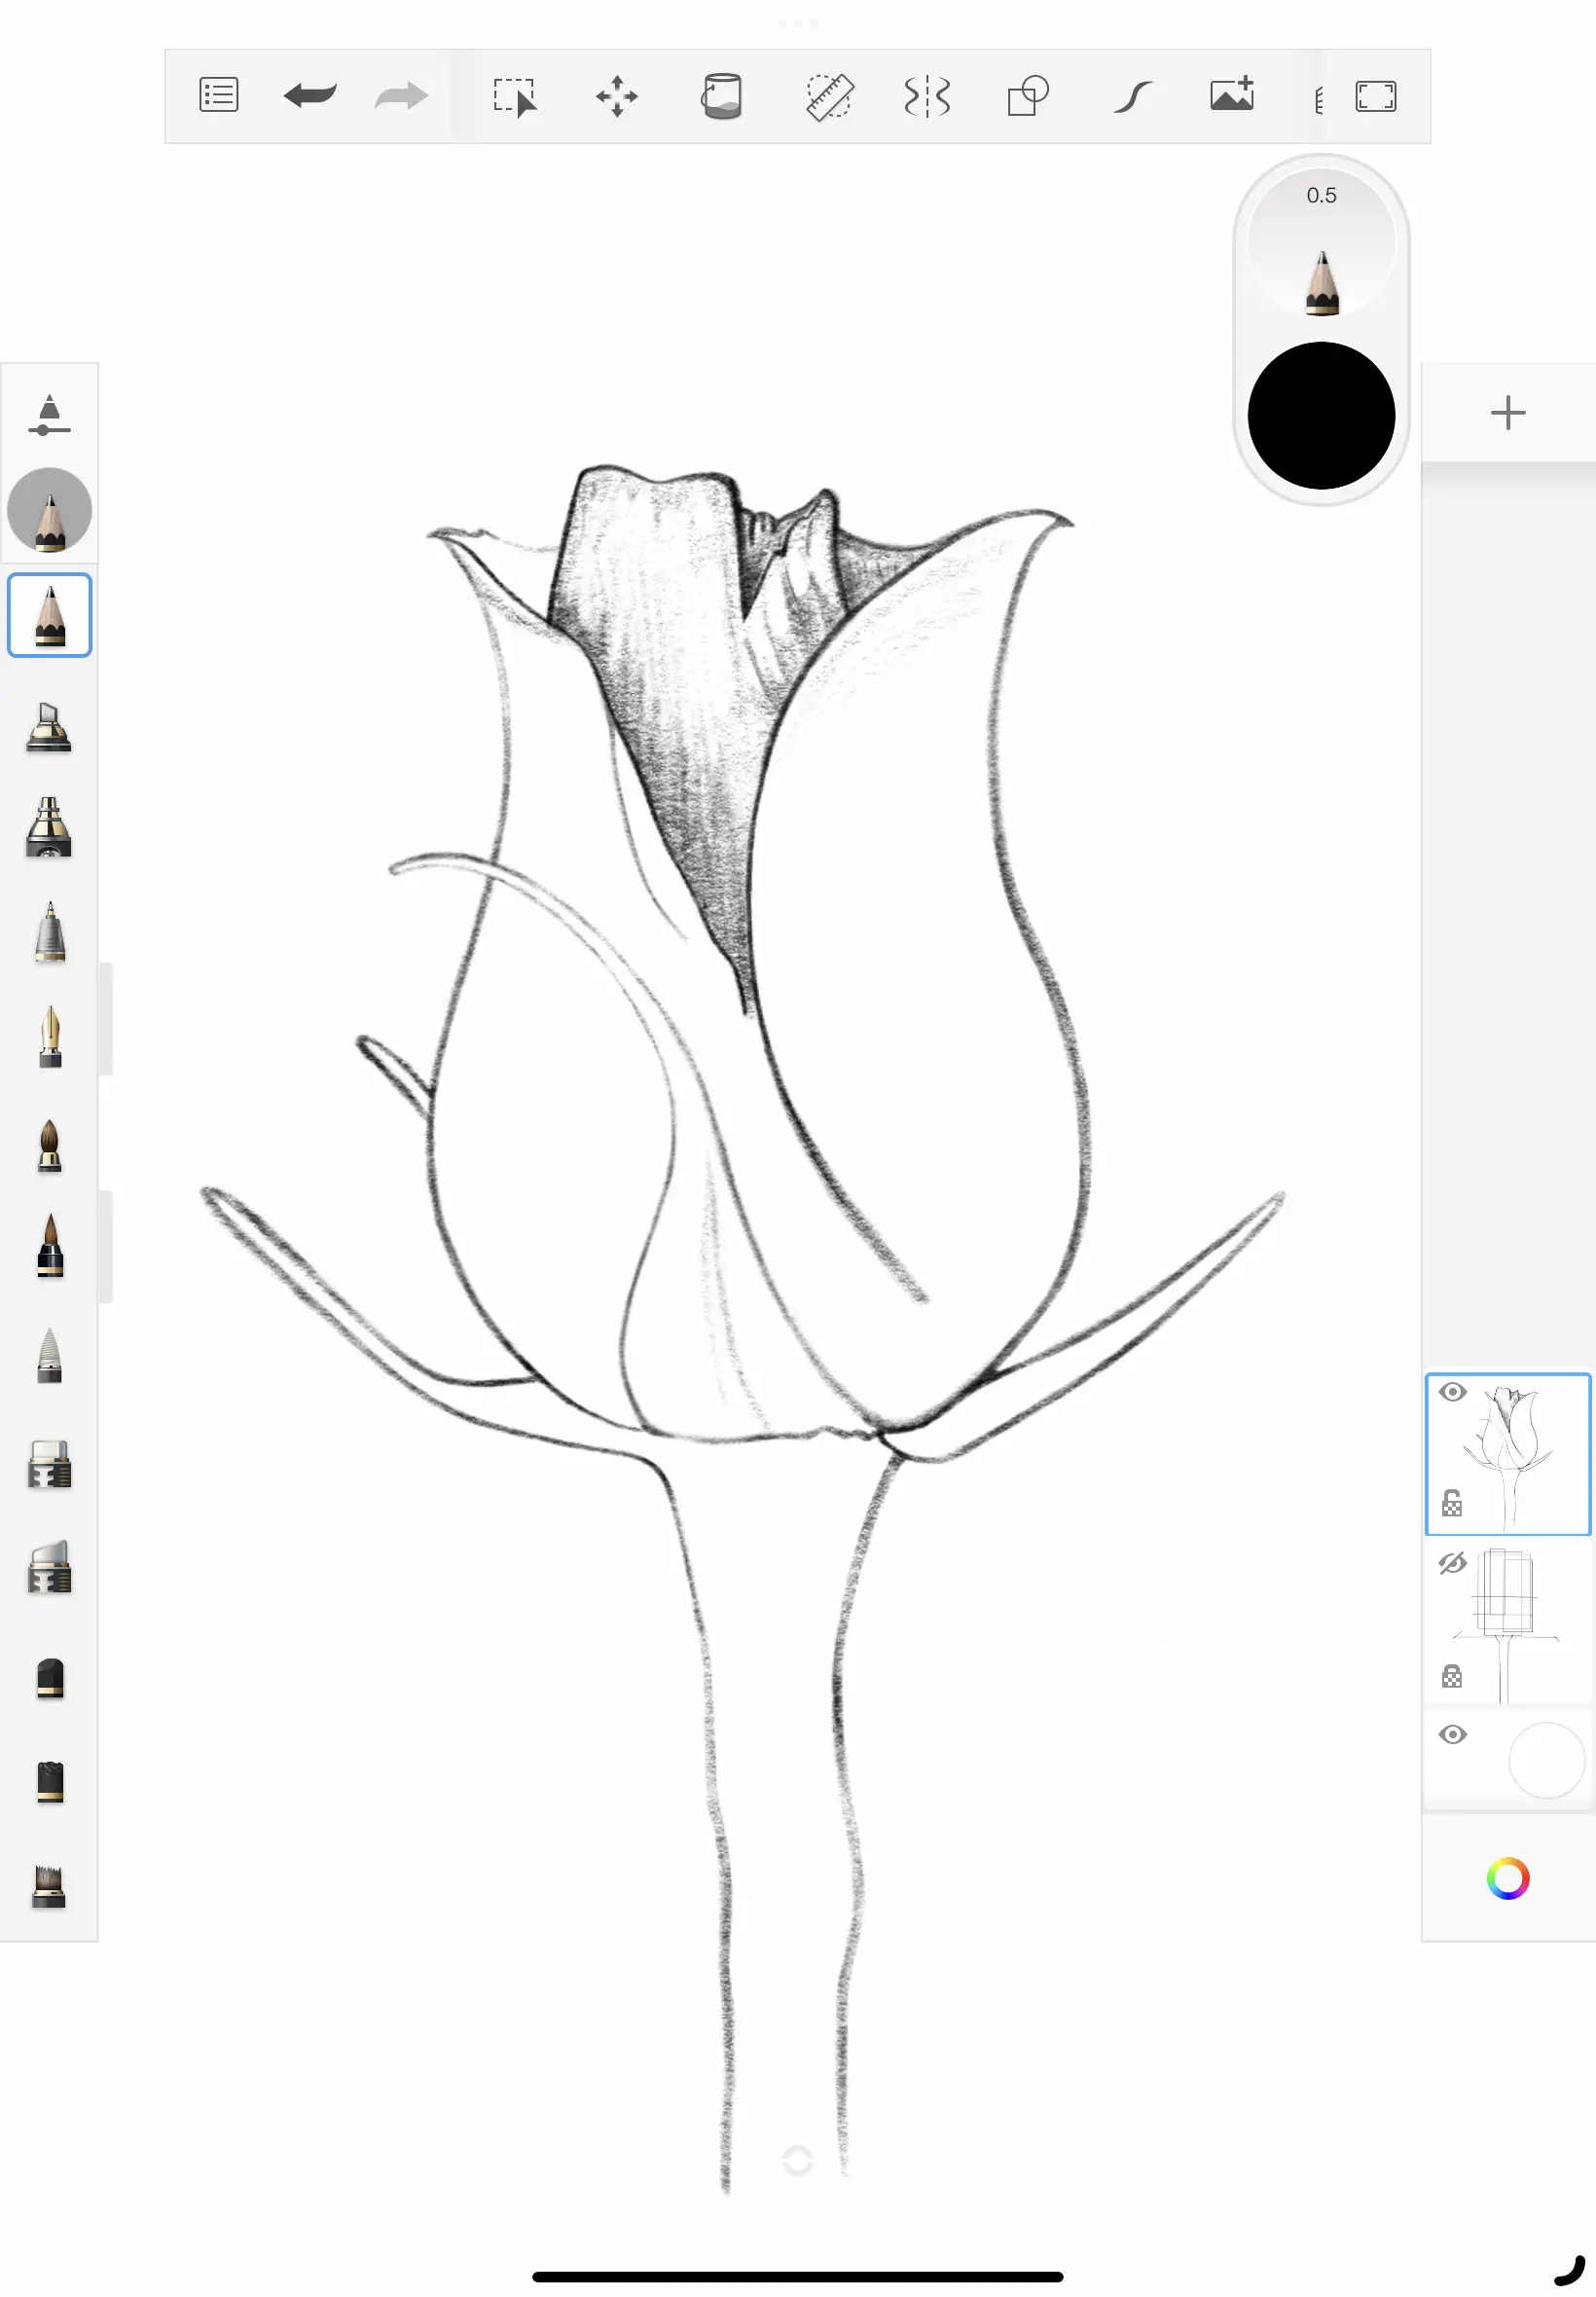
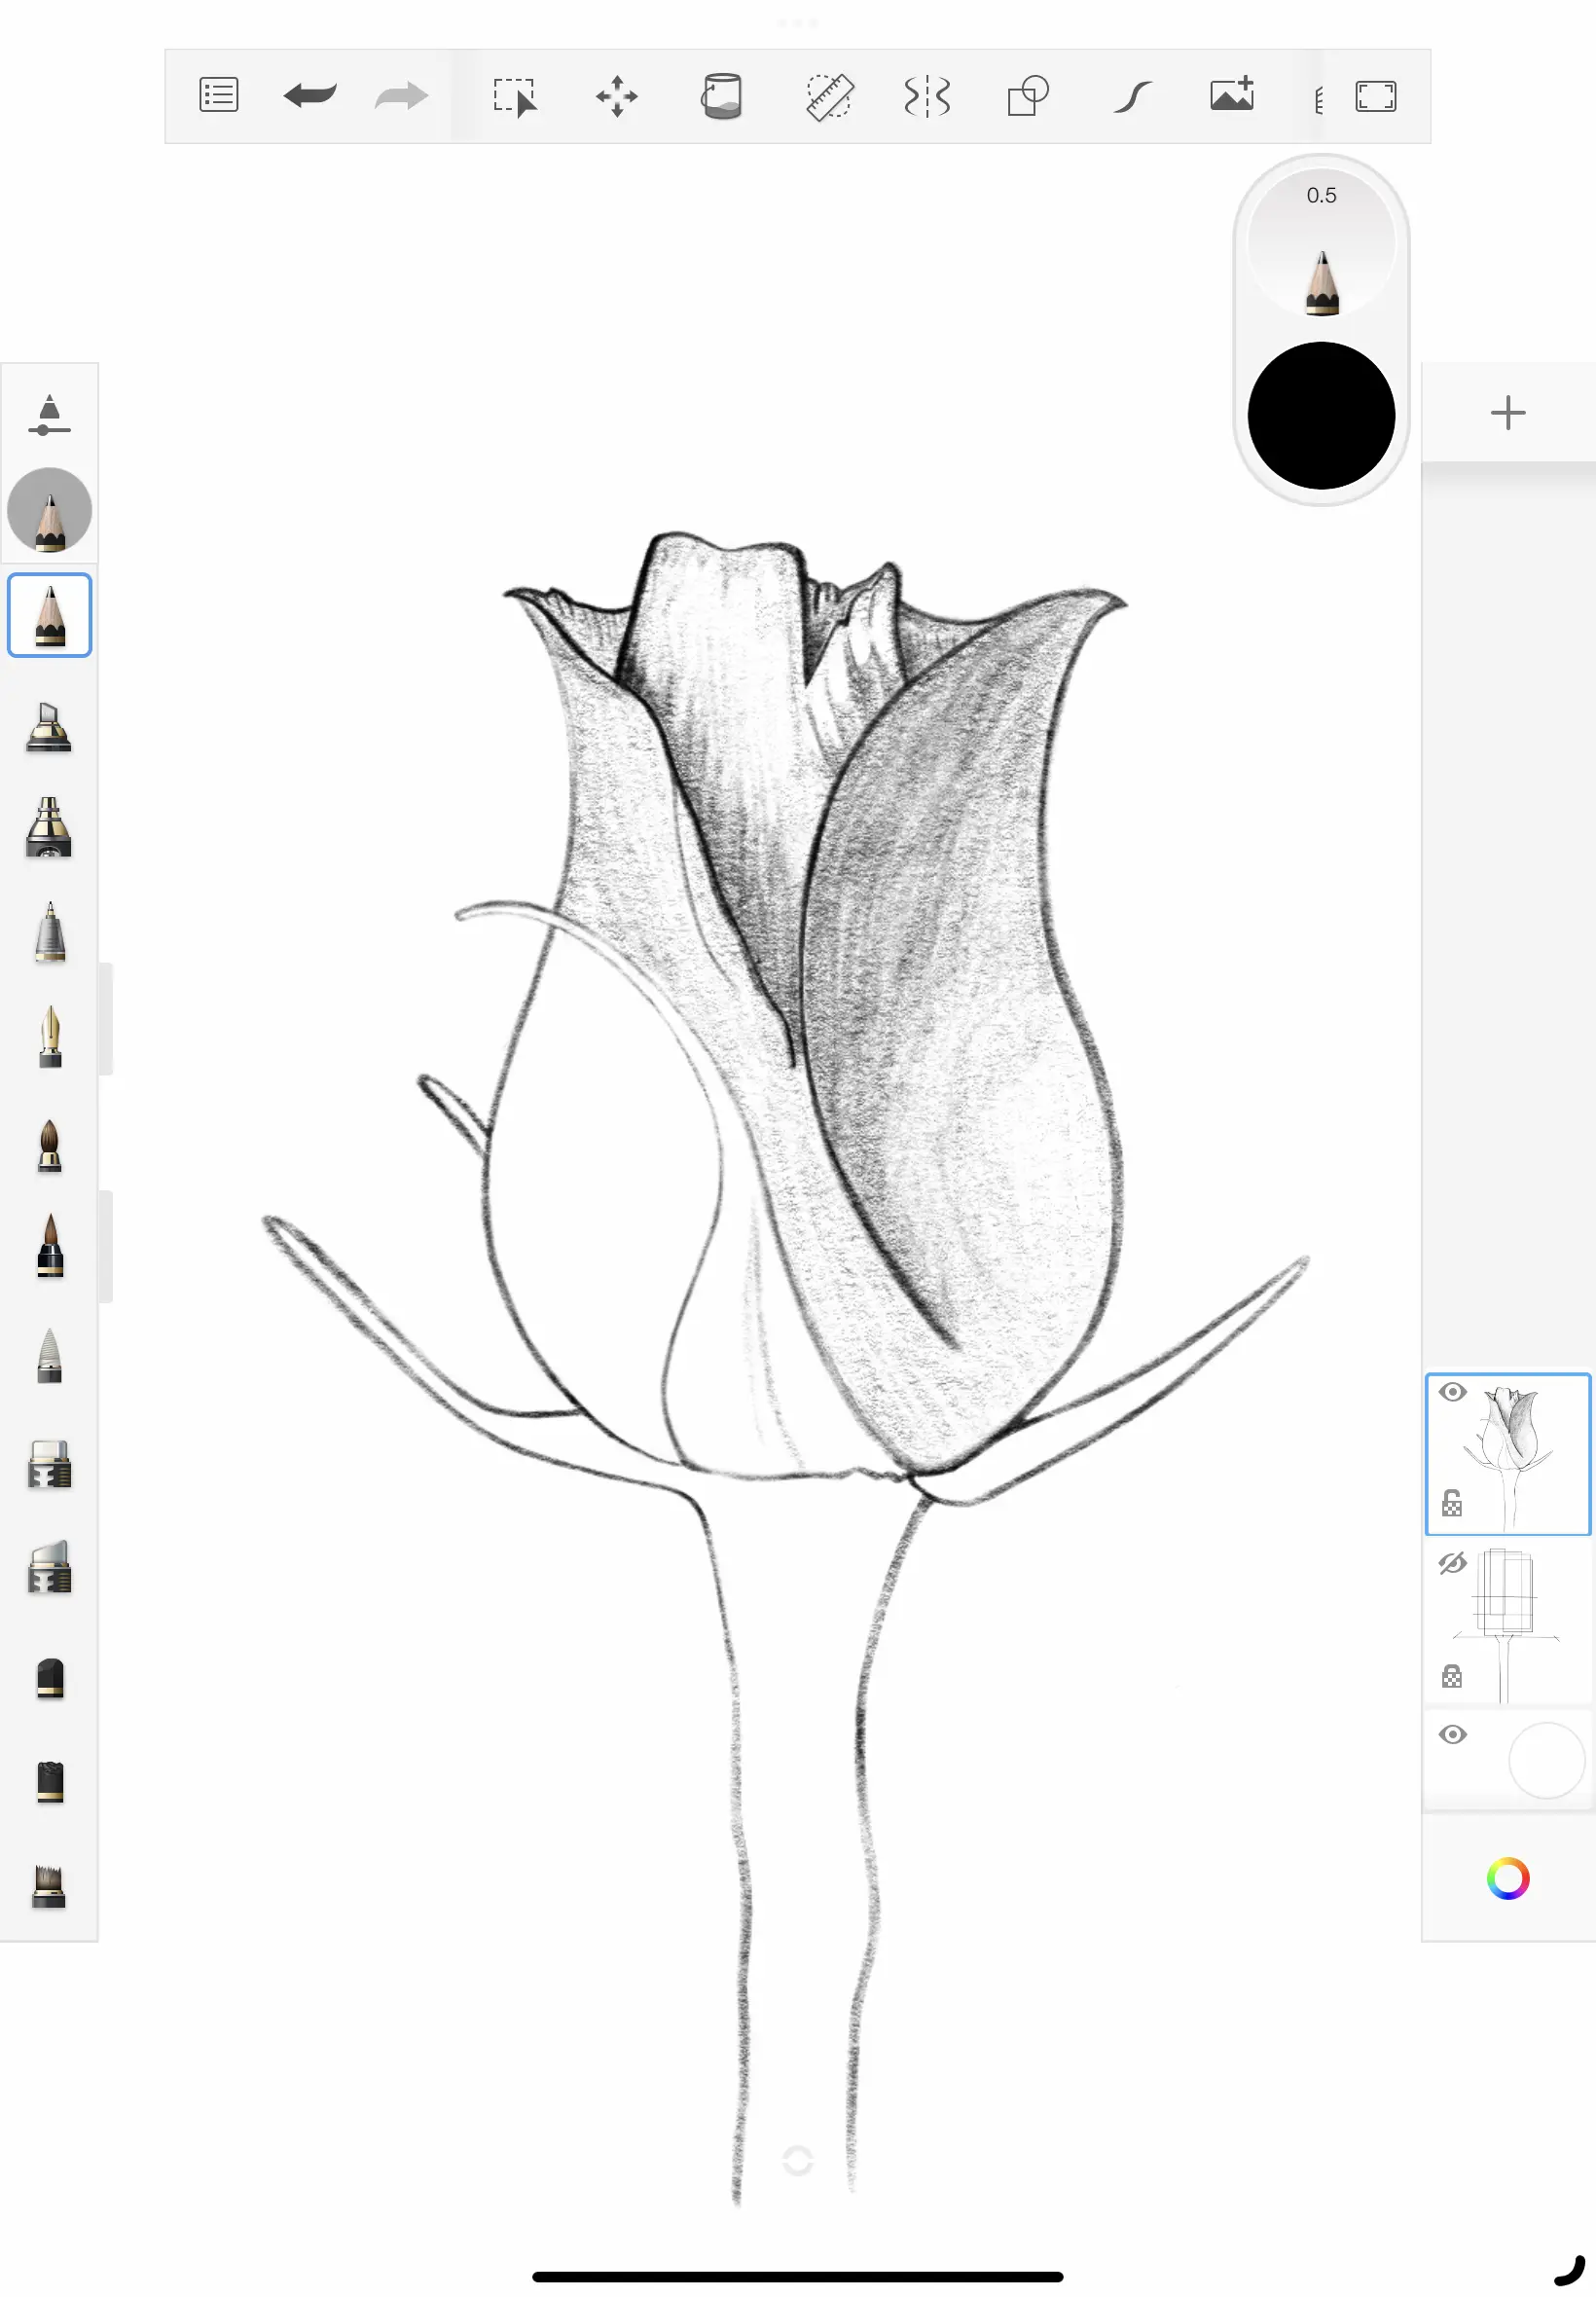
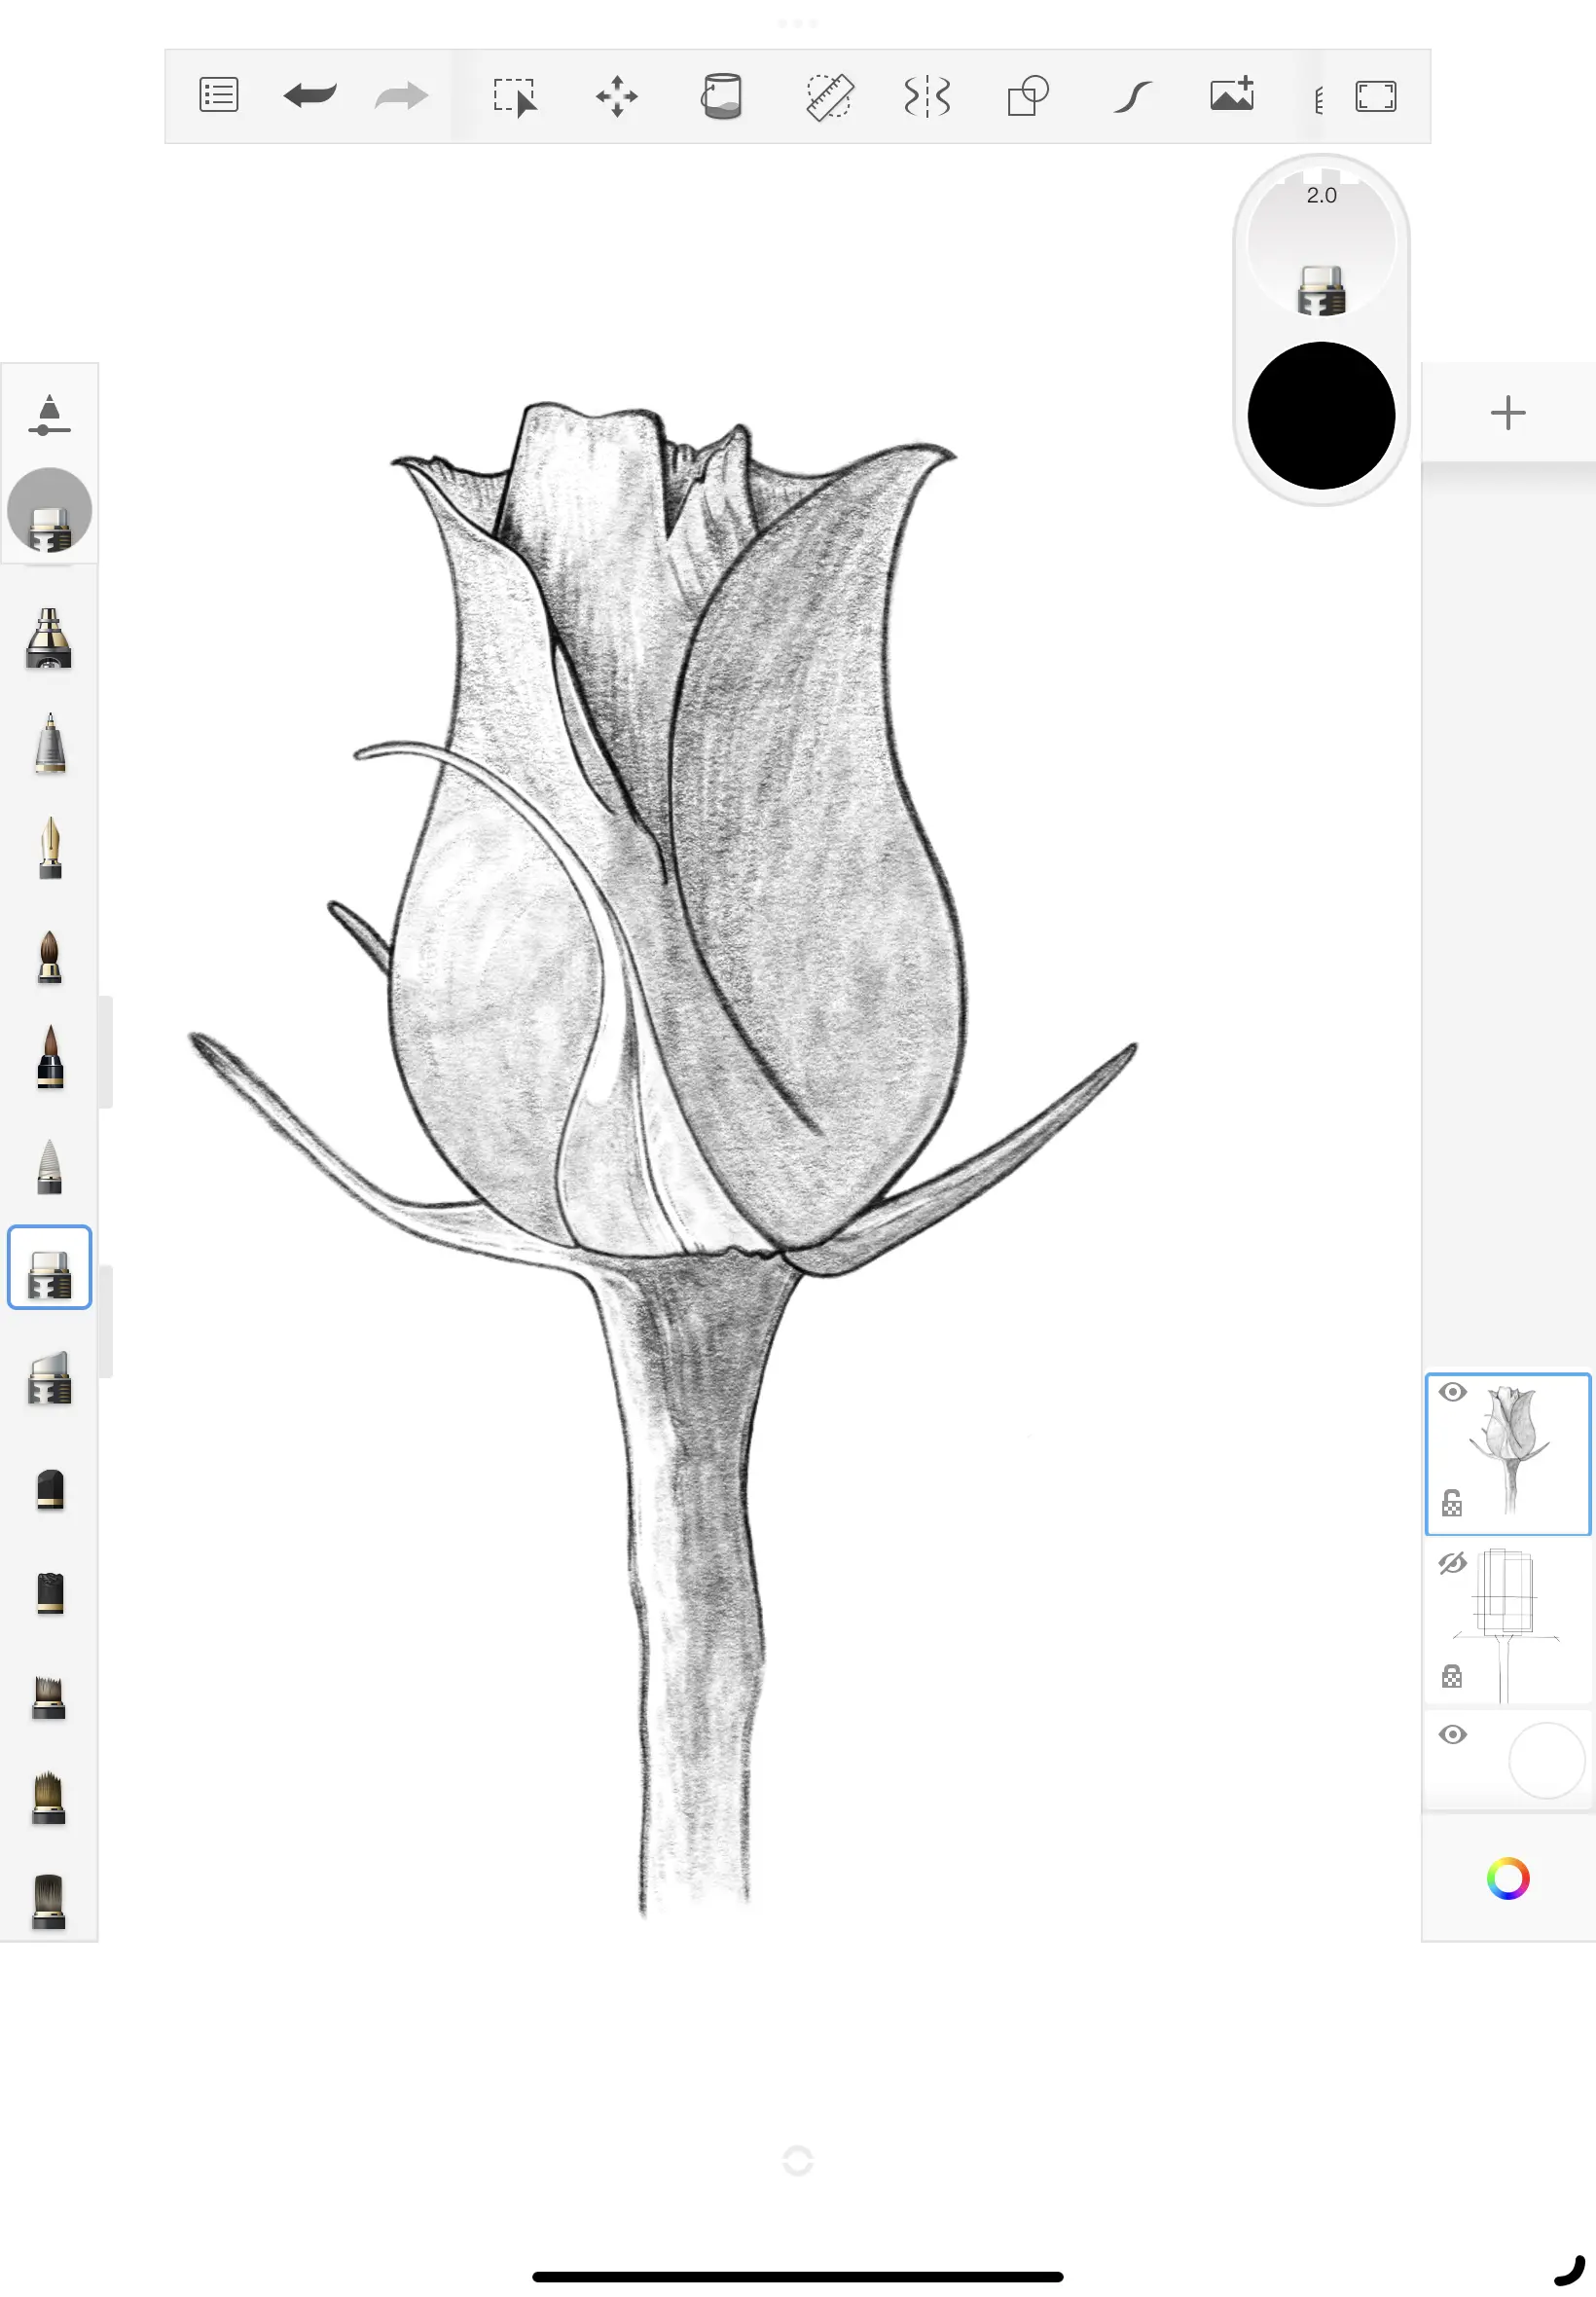
Now that you’ve finished the initial shading, let’s move on to the next part. Concentrate on the parts farthest from the light source and gradually darken them until they approach the line where you indicated the difference in light. If you wish, you can add another layer of even darker pencil lines, starting from the edges farthest away but stopping just short of the other darker areas. This will create a nice visual gradient effect.
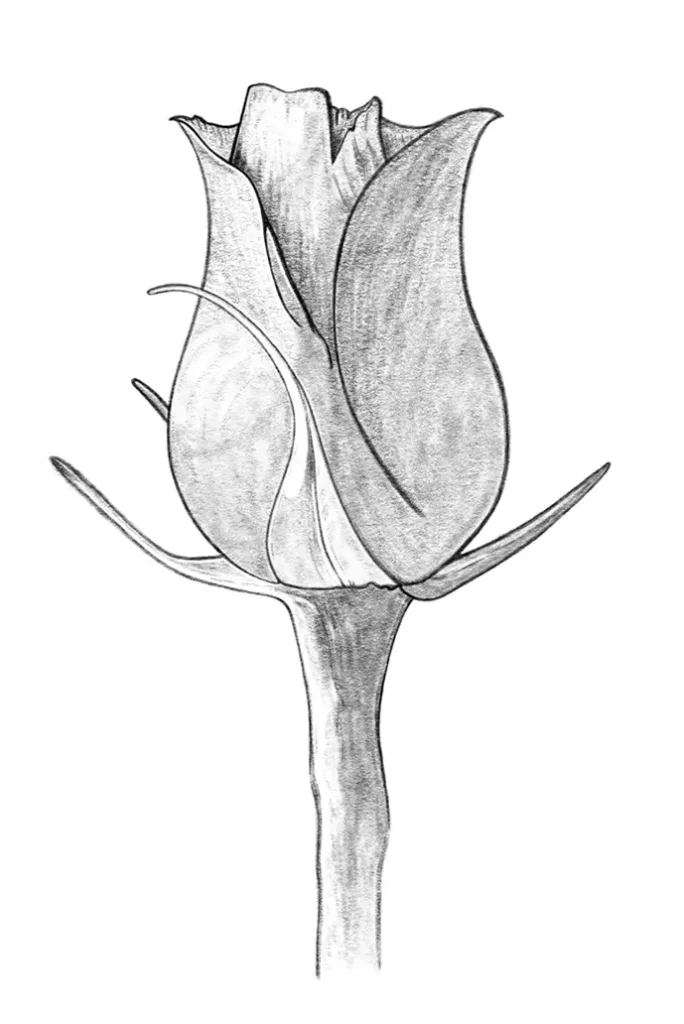
Well done on reaching this point! Your shaded flower is a reflection of your dedication to your art journey. It’s great to see your skills improving and your creative flair taking shape. Keep up the good work!
Conclusion
As you move forward with your future projects, keep in mind the importance of a solid foundation; it plays a pivotal role in achieving a well-balanced final result. Having a strong initial framework often separates consistently excellent finished artwork from pieces that might need adjustments due to disproportion or a lack of symmetry.
In the realm of drawing, just like in any creative endeavor, progress is rooted in the dedication to refining your skills. Each stroke of your pencil or pen becomes a stepping stone on your journey toward mastery.
It’s crucial not to let what you may see as failures or limitations discourage you. Instead, consider them as markers of your dedication and growth as an artist. Embrace the journey of trying out new techniques, and keep in mind that repeating and practicing is a steadfast companion along your artistic path. With consistent effort, you’ll start to see your skills flourish.
Always keep in mind that every artist, no matter their level of expertise, began right where you are today. So, approach your practice with a clear sense of purpose and allow your distinct style and creative vision to naturally develop and evolve. Your artistic journey is truly one-of-a-kind, holding the potential for continuous growth and self-expression.
Mastering the art of drawing not only grants you the joy of crafting beautiful compositions but also signifies your growth as an artist. With every petal you meticulously bring to life, your skills expand, and your potential flourishes.
Our journey of drawing this rose together has been a delightful experience, and I hope it has provided you with valuable insights and skills to carry into your future drawing projects. Keep nurturing your artistic passion and remember that each stroke brings you closer to your creative goals.
Happy drawing!